kraggrim
Marquis


Customising Armours
This tutorial is not about creating your own from scratch, it's about mixing up the
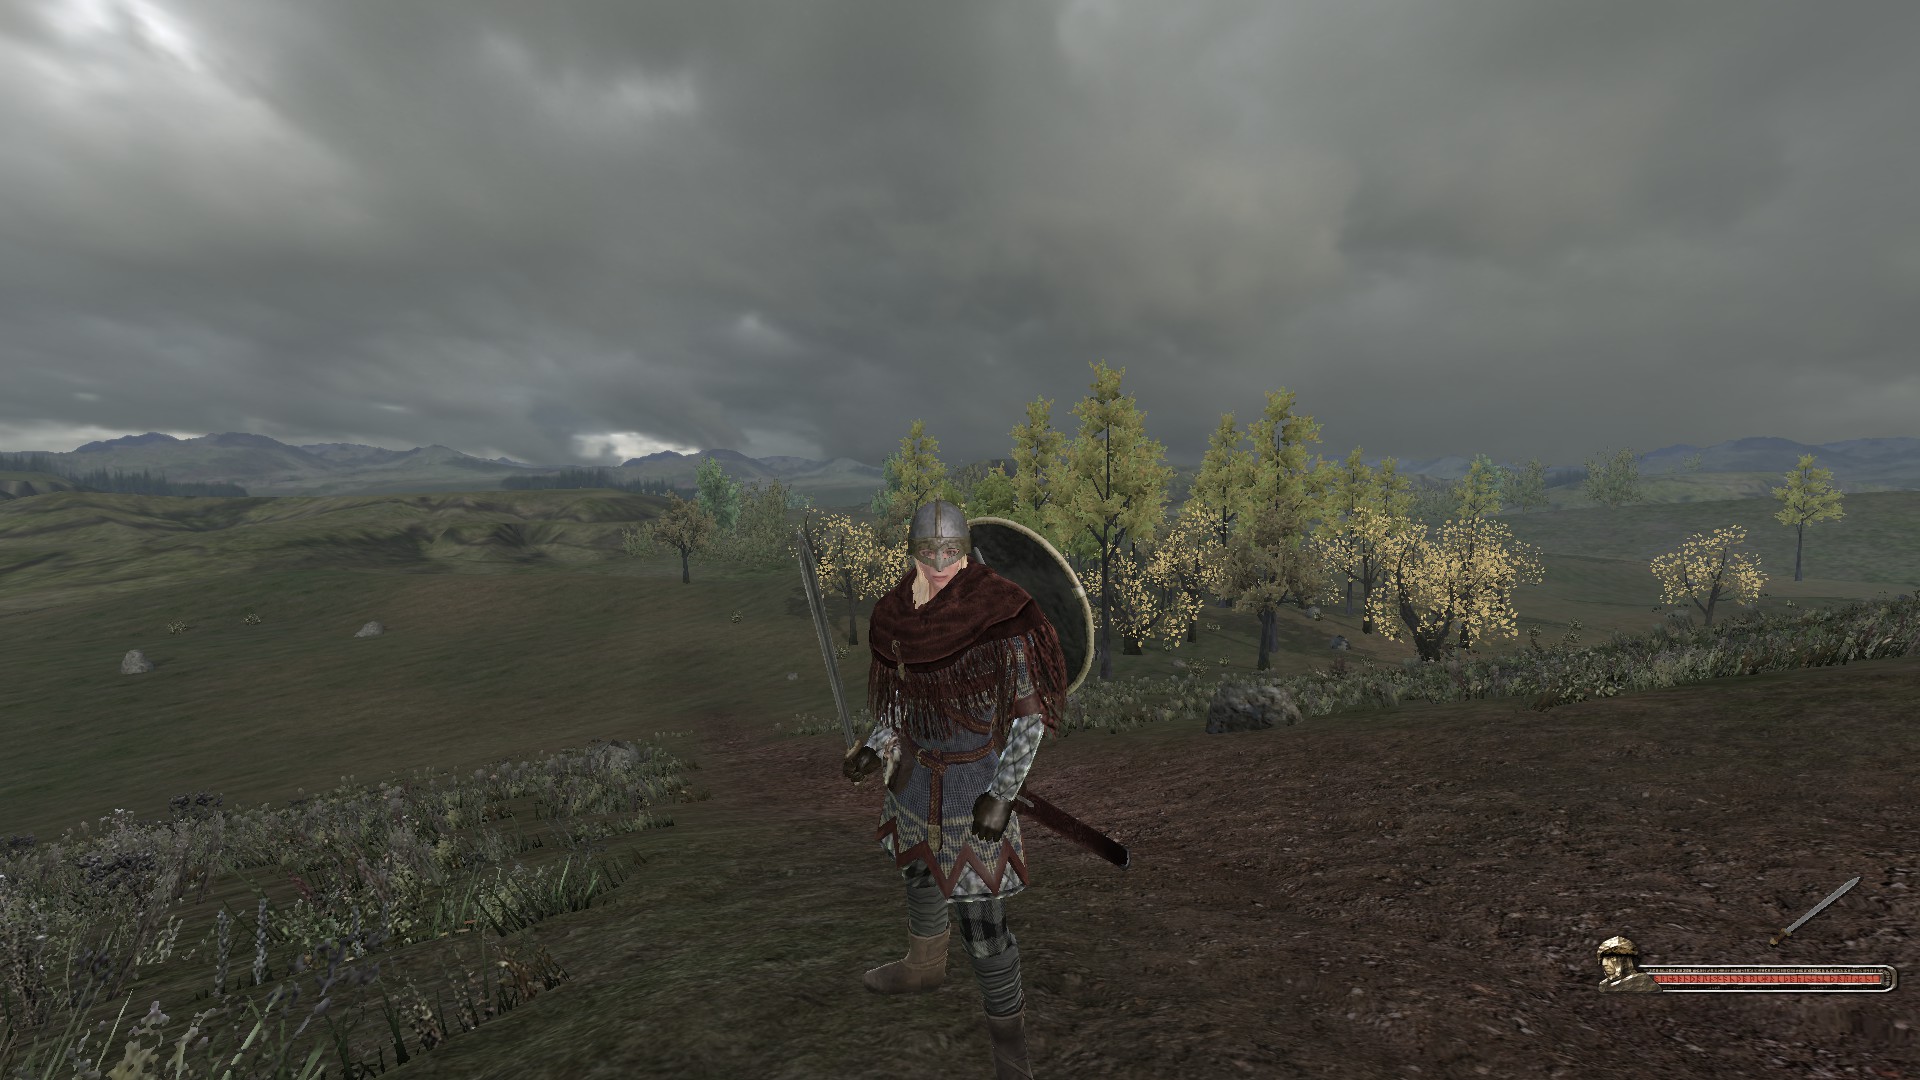
existing armour parts and accessories to create something unique. An example is the image
above where Orm's Byrnie now has a wolf head rather than a bear. The way Viking Conquest's
armours have been set up makes this very easy (well done Lenny). If you already know how to
use Open BRF then you probably don't need this, I'm just writing a VC-specific tutorial to help
those who don't.
1. Get Open Brf.
2. Go to your /modules/Viking Conquest/resource folder and make a backup of
vc_armors_generic.brf.
3. Open up vc_armors_generic.brf in OpenBRF, and you'll see a list of armours down the
left hand side. Near the bottom you'll see thor_armor. We'll work with this one since it
is only worn by one npc in the story game (and I think none in sandbox) so it's a good
candidate for near-unique player armour.
4. thor_armor is the base armor, the .1 to.5 are the accessories and neck. All the armours
follow this basic setup, though sometimes the ordering is different so check before
duplicating/deleting. You want all these to be subsequent, don't put any of your
backups or whatever between the parts of an armour (or its lods).
5. The .lod2.1 etc are the versions that appear at long distances. They are less detailed
so put less unnecessary strain on the computer. If you're only doing an armour for the
player then you don't need to worry about these, there will only be one instance and
generally the camera will be close. If you're modifying an armour that will be used by
troops then you'll want to work with these, but the system is easy to figure out.
6. For this example we will do as I mentioned above and swap a wolf skin for the bear skin
on Orm's Byrnie/thor_amor. Go up the list and find "Chain_Wolf_01.1". Right-click on this
and select Duplicate (near the top of the menu).
7. Select copy_Chain_Wolf_01.1 and use Alt+down-arrow to move it down the list until it is
next to thor_armor.1 .
8. Rename thor_armor.1 to something else, thor_armorX.1 or whatever you want, and move it
out of the way so it is between the thor_armor and Scalemail02.lod3.2 above.
9. Rename copy_Chain_Wolf_01.1 to thor_armor.1, it should now look like this:

armours, add multiple accessories. Not everything will fit together but play around with it. You
can check for clipping etc by running it through animations (between the list and the grey
image window).
Further reading
10. If you want to use parts or armors from one of the cultural armours, say an Irish
cloak, you can do that too. Save your work then open up vc_armours_irish.brf and find
"Chain_Irish_03.1". Right click on this and select "Export rigged mesh".
11. Open up the generic armours brf and then go the Import menu at the top and select
"Rigged mesh" then find the file you previously exported and import it. Then do the steps
from point 7 above.
12. You can also change the look of an armour by altering its material:

a separate materials brf.
13. There will probably be another couple of version you can swap in next to it.
Here is one armour with materials vc_armor01, 02 and 03:

Also note that the belt-pouch can use the same material as the main armour, so you
probably want to pick ones that share a single material.
If you want to edit the stats or make a whole new armour then use programs called Morgh's
Editor or MB Barracks. Plus there are tons of tutorials and posts on this aspect in the
Forge section of the forum.
If you have visual problems then look through the OpenBRF section I previously linked, plenty
of help there.
To view a newly made armour (or any new items you've added) in the cheat-menu follow this guide.
Be aware that completely new created armours won't have the medium or heavy armour
penalties, just how the system works for now.
Also remember that when the game updates it may very well overwrite the brfs, so you might
want to make a copy once you've made the changes.
So yeah, that's it. Post any tips or steps I've forgotten about and some pictures of your
favourite creations.

Alternative Wolf Skin


Just extract it with 7zip or whatever then import it as a rigged mesh into your desired brf, then rename/replace as in the instructions in the first post. Can be used without the head part (or the fasteners) if desired.