poomtang
Knight at Arms

Please bare in mind this is how I do things, there are lots of different methods out there, this one is mine and I've only wrote this because lots of people have asked me about how to texture, this is how I personally manage do it. I hope it helps with your modding.
Thanks for looking
Poomtang
Tools needed
Wings 3d
Photoshop (P.S.)
Smart Normal
OpenBRF
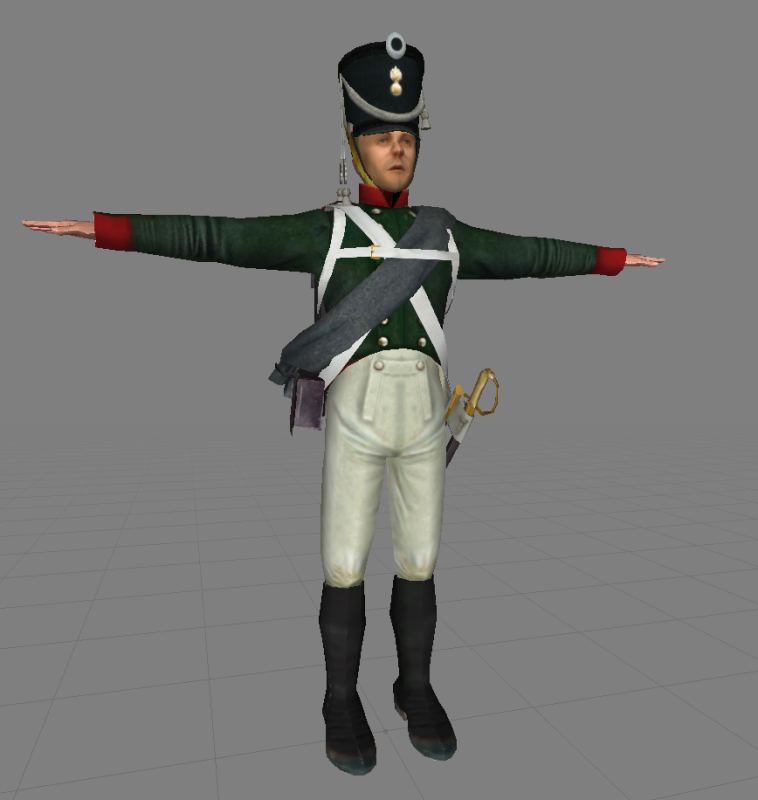
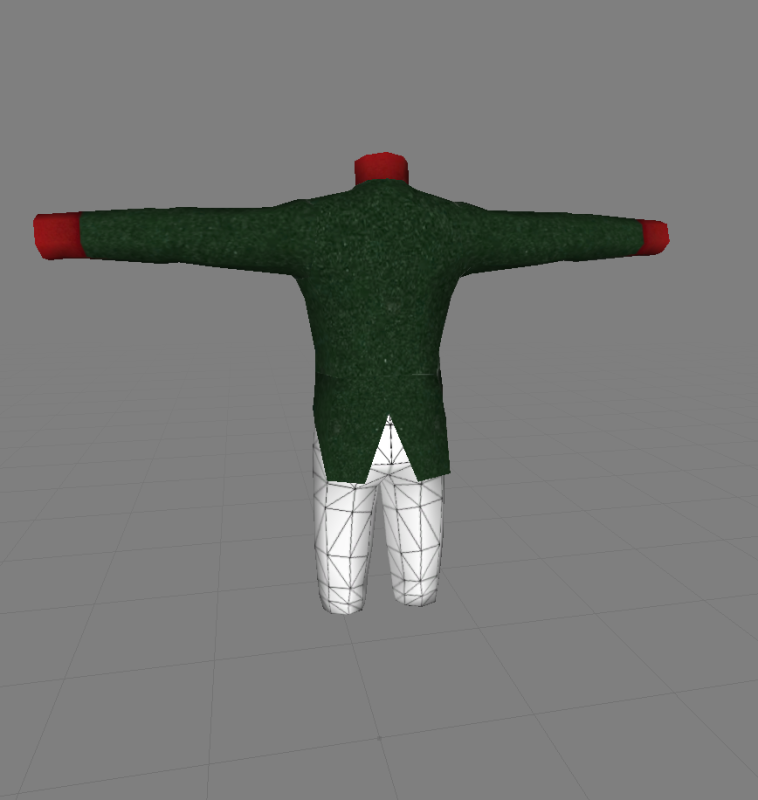
OK here's the shell model of our first Russian infantryman, it looks like nothing at the moment, but I'm going to invite you all to watch it grow into a beautiful infantry model for the Russian army, this will be a joint effort by myself and Keryyin, as I teach Keryyin some texturing tecniques, so plase keep watching as it grows.
I will show you how to texture, the way I do it, I will show how to make specular and normal maps, in fact all th parts you need to make a nice model for your own mod.
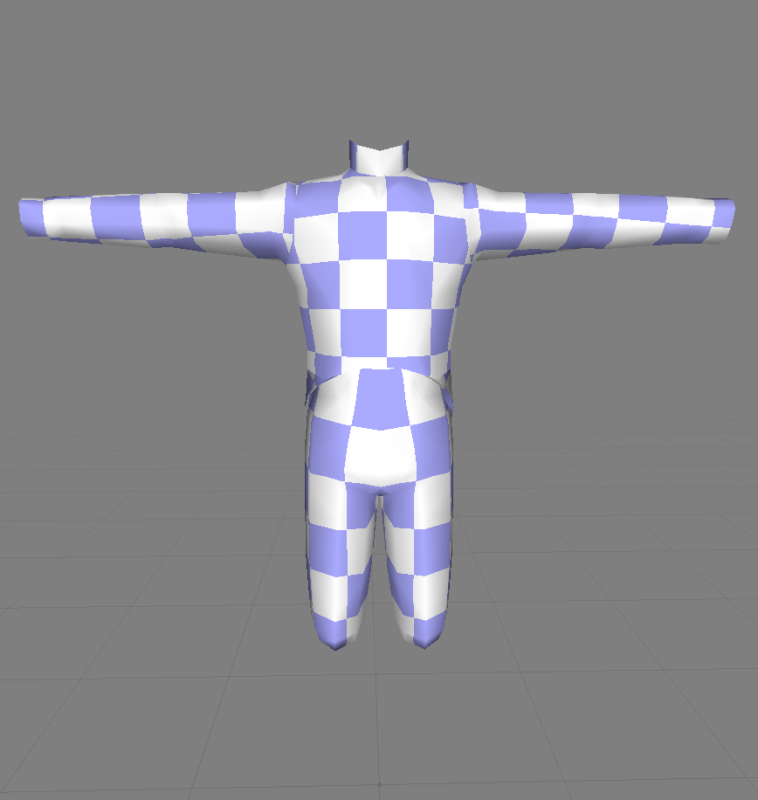
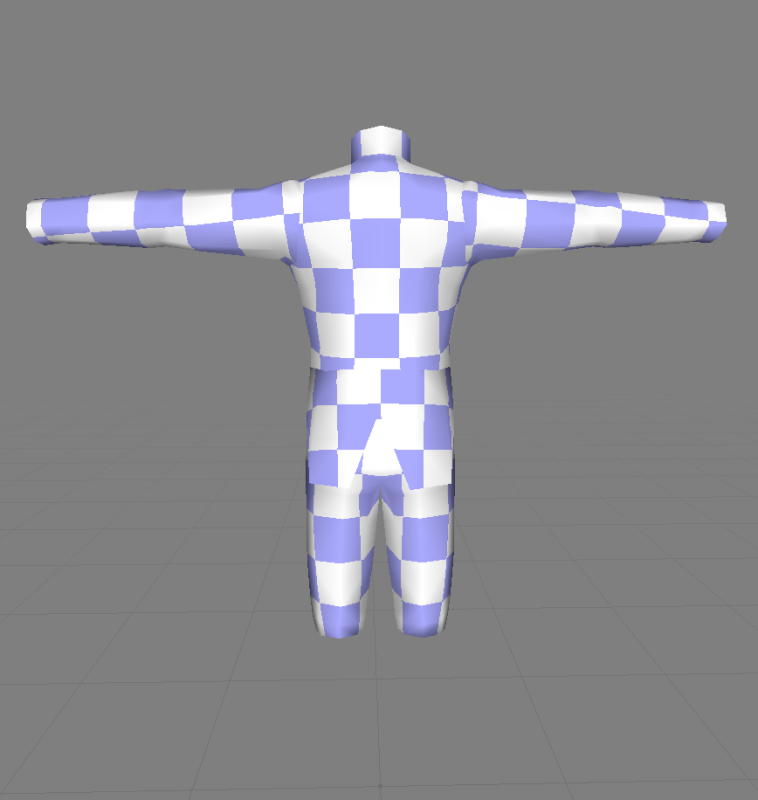
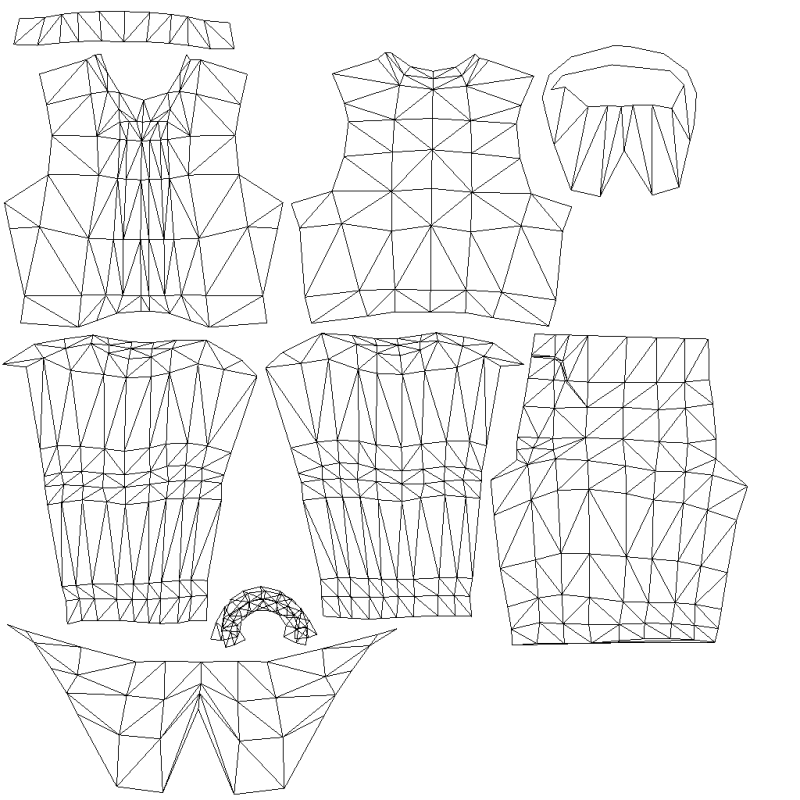
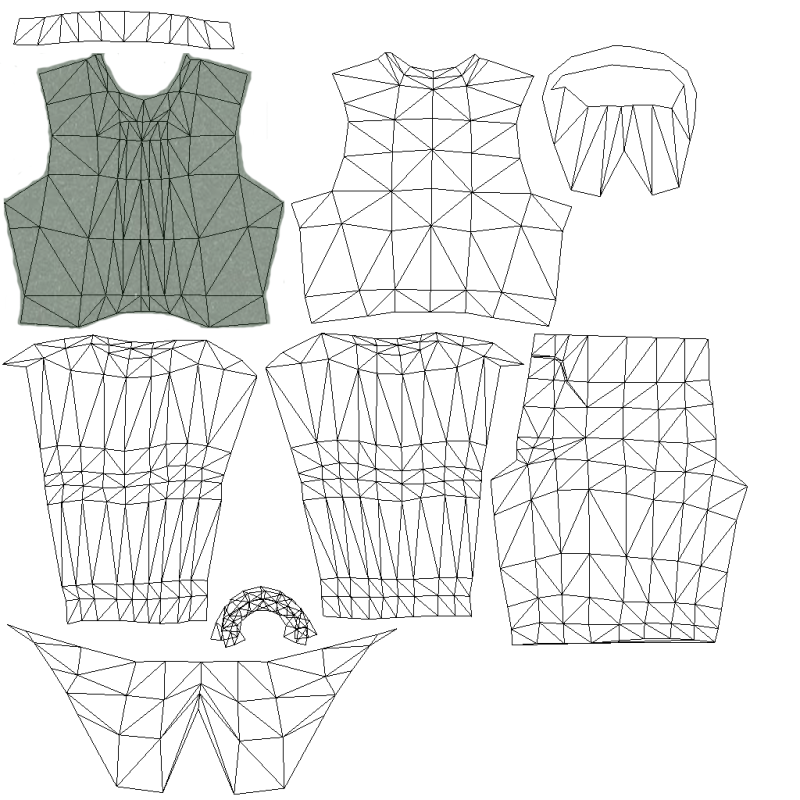
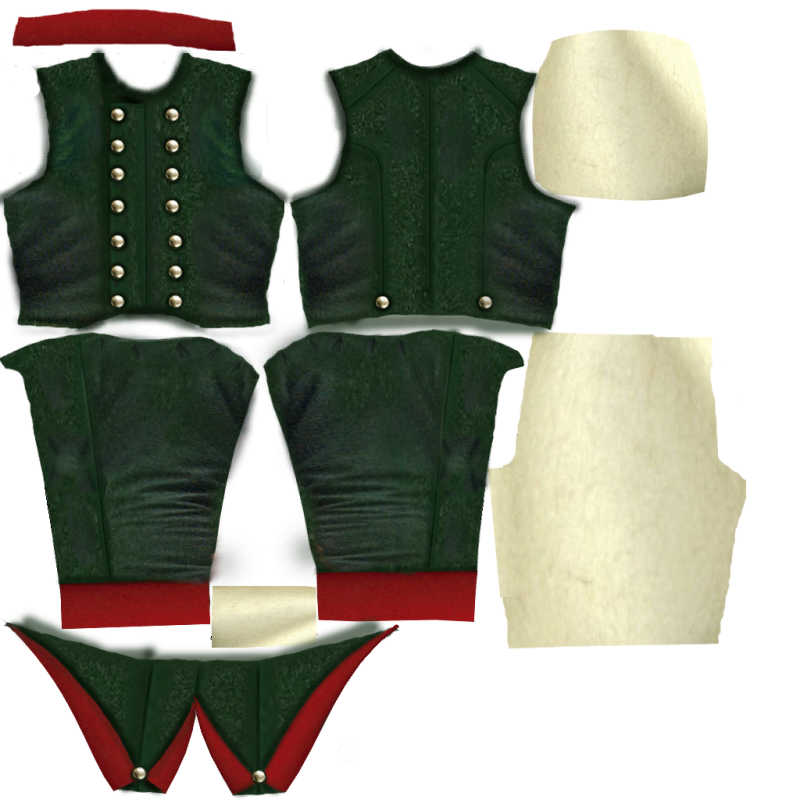
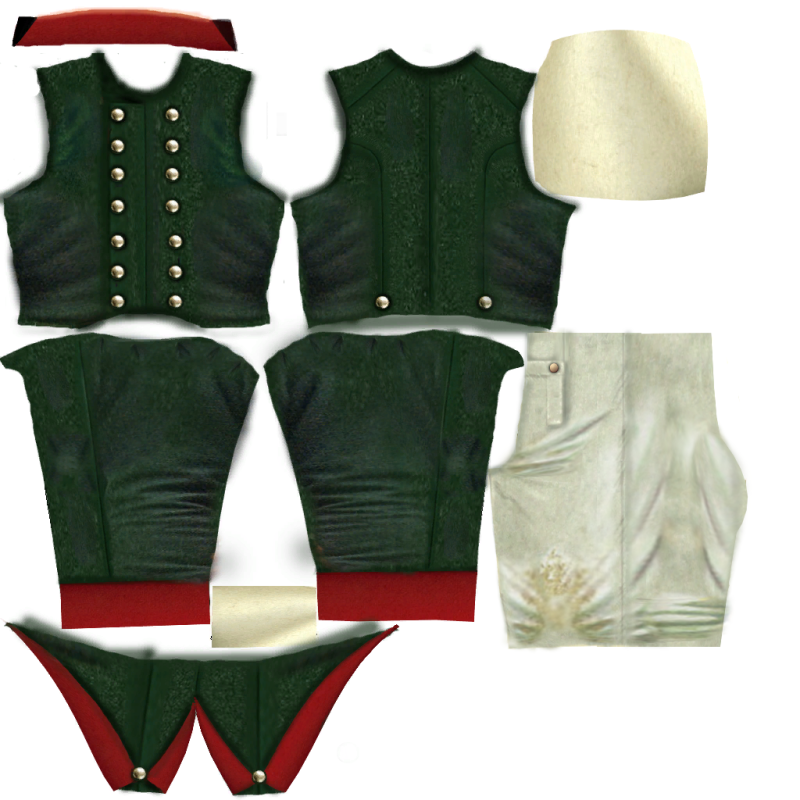
First step, once we have made/selected the model we want to texture is to start with a blanck U.V map or texture map, this one, as you can see, I've cut up into sections using Wings 3d, I have seperated the chest area, the back, the arms, both left and right are seperate, I've seperated the collar, and cuffs, the tailcoat, the tailcoat lining and the legs, this is now ready to go for texturing.
The next step is to do a little research we want to find out exactly how a Russian soldier of the Napoleonic wars looked, so simpley google it in google images and see what you can find, save the pictures you find for reference material.
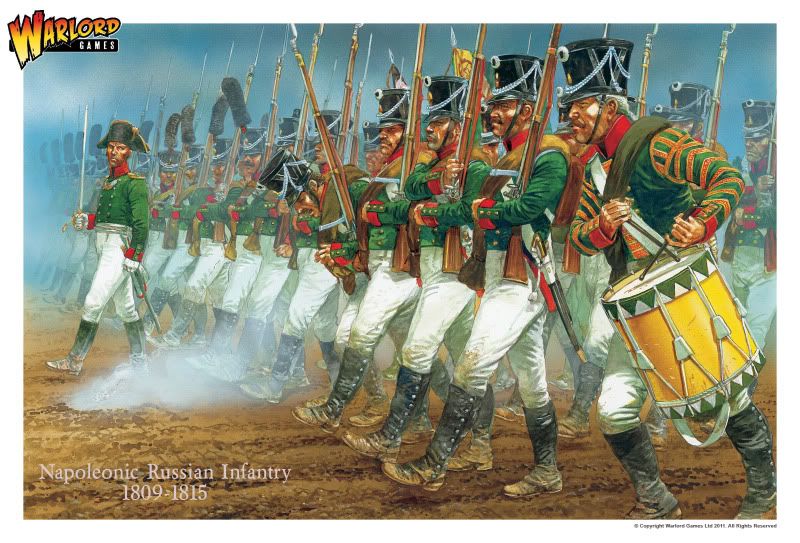
OK basically, the Russian infantryman we want to make uses a green woolen tunic faced red, with white breeches make of cotten or linen. The next step is to google for swatches of green and red wool, here's some I've found.
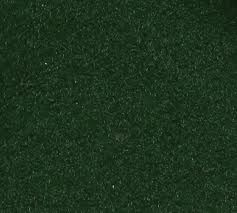
Green wool material for the tunic, this I want to copy and paste straight onto my texture map in photoshop, to the right of your workspace there's a little tool for adjusting the opasity of you texture use this to basically see through your woolen swatch, set it to 50% and place the now transparent swatch over the chest area.
Using the edit, free transform option, adjust the size of the swatch until it completely covers the chest area. Once you have done this, trim around the edges, using you rubbe, or errasor tool, until the swatch matches the pattern of your uniform jacket chest. see below.
Repeat the process for all the main parts of the uniform, until it is completely green, once this is done, you can re-adjust the opasity back to 100%.
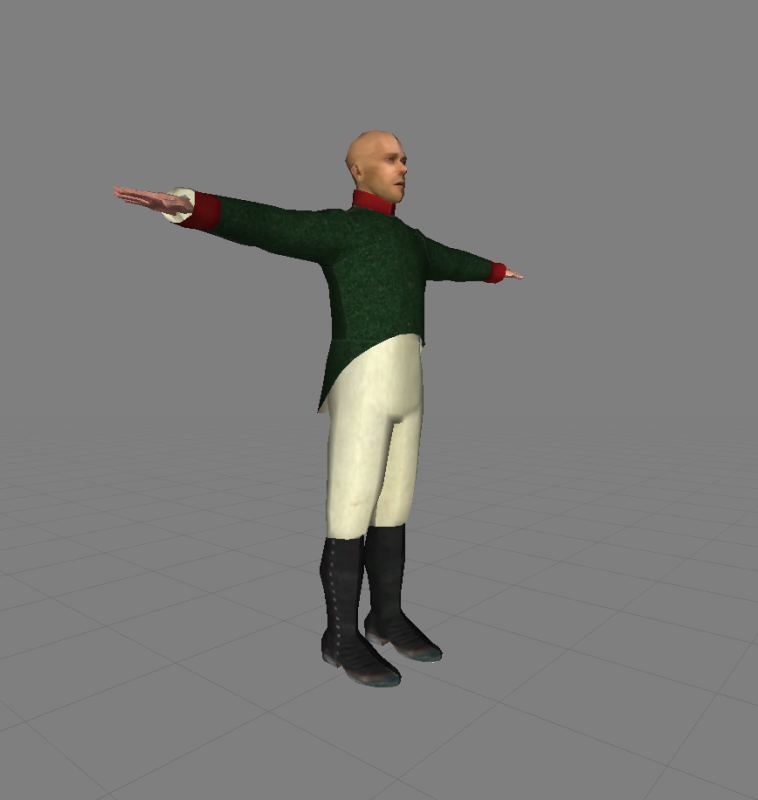
Here you can see I've moved on a bit and copied and pasted swatches of red military style wool and linen for the collar, cuffs, tailcoat and tailcoat lining.

I've saved my texture as a DDS and introduced it to my mod by importing the material and the texture via open BRF, I've also saved and imported my model into my mod using open BRF. Here's the result so far.
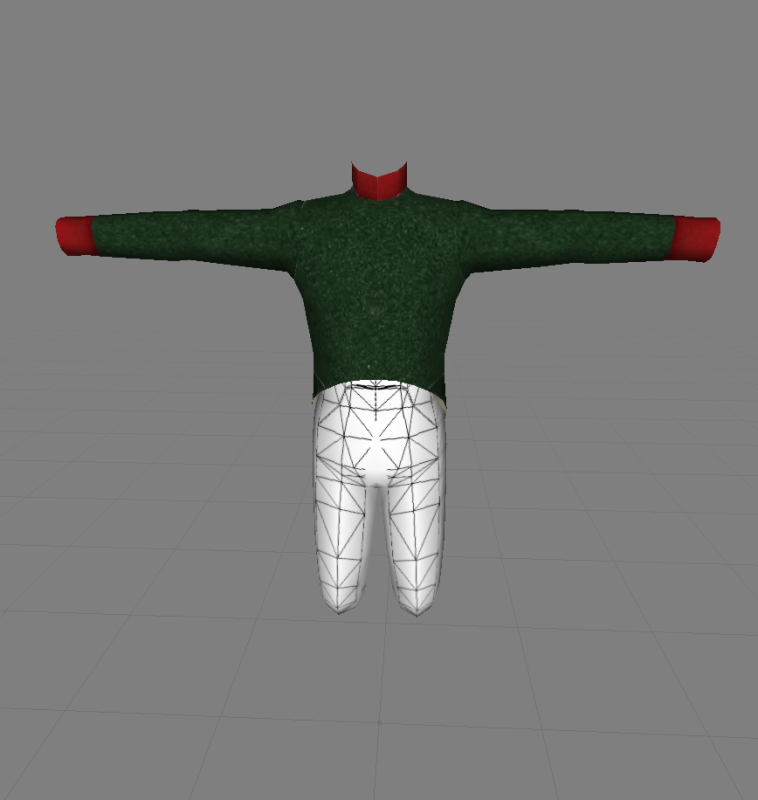
If you've been following the tutorial, your model should now look something like this.
CLOTHING SEAMS, BUTTONS & BASIC SHADING
There's a couple of ways to make these, the first is to draw the lines in black in the position you want with a solid brush in photoshop, the other and the method I prefer to follow, is to simpley copy a seam from a piece of clothing, say for example, use google images and type in green woolen coat, lots of images will pop up. Copy and paste the one that best matches your uniform coat onto your texture, then use the lasoo tool to copy the part you are interested in , in this case the seam from a sleeve. Put that seem into the position you want and rub out the remain parts of the google image you don't want.
You can use a combination of, edit, free transform, warp to manipulate the copied seam into the size and position you want, you can further use the rubber, or better still the opasity tool to blend in your seam.
Here's an image of how the seams should look on a uniform from the period, its a bit of a pain in the ass the match them all up, but this is what you are looking to achieve, You can you the brush tool to enhace the seams and provide a little bit of darker shading, more on that later.
Have a close look at the next image, here you can see that I've added buttons and some basic shading, to create the illusion of shadow on the cloth of the coat. First the buttons, find an image of a button that you like from google mages, copy and paste as described above, re-size using edit, free transform from the drop down menu in P.S.(photoshop) and position your buttons where you need them on your model.
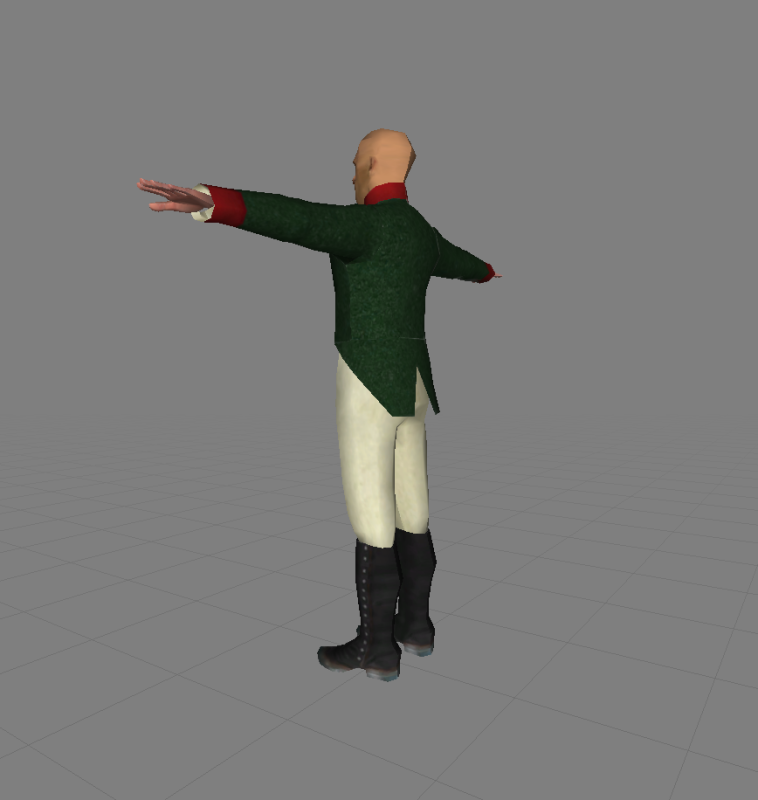
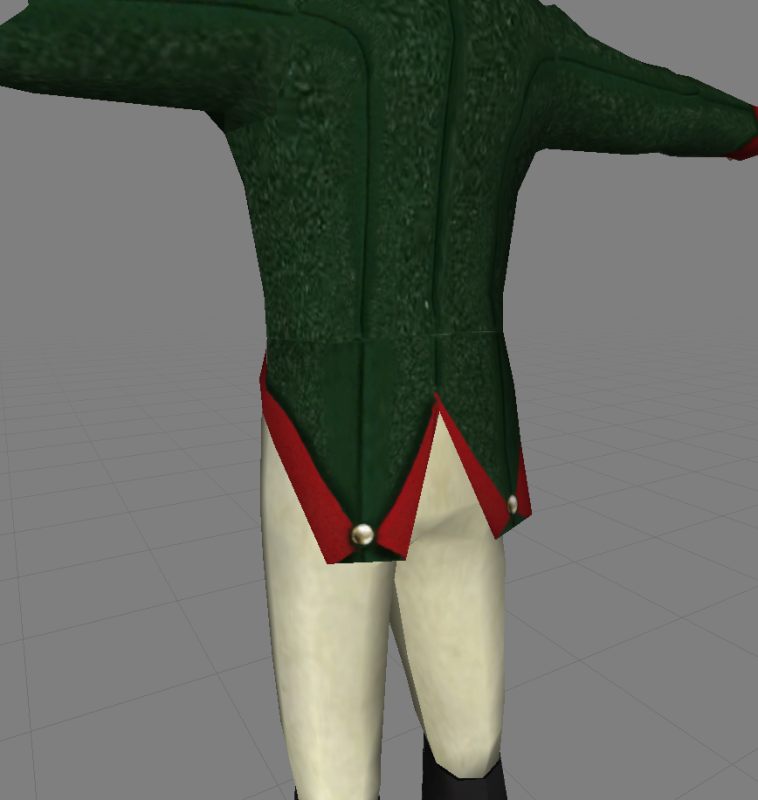
Next go back to the layer of your texture before you pasted the first button, select a brush, I've used a soft round at 17 pixels and I've set the opasity to 75% because of the darkness of the material of the uniform. You may have to do this several times, apply your paint behind the button to make it stand out from the rest of the uniform, the soft round brush will have the effect of radiating out from behind the button, do this for every button. You can also do this behind the facing colour of the cuffs, the tailcoat as you can see here, below, all of this has the effect of creating a shadow and making the red trim stand out even more and catch the eye better. Note I've only shaded the one on the left of the uniform jacket and not the right to show the difference. Next try shading the edges around the neckline, armpits, collar and cuffs as per the second image below.

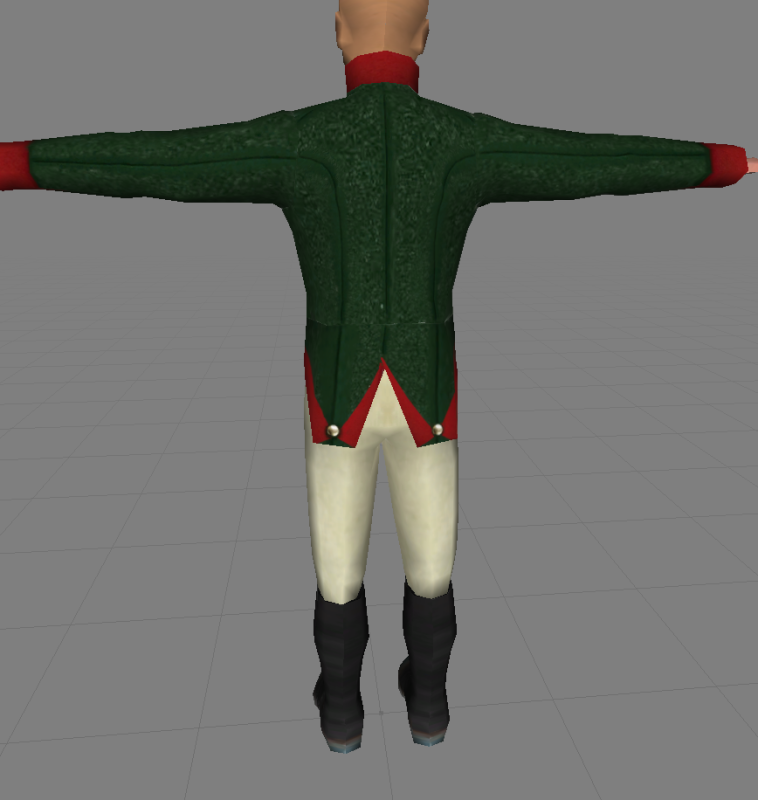
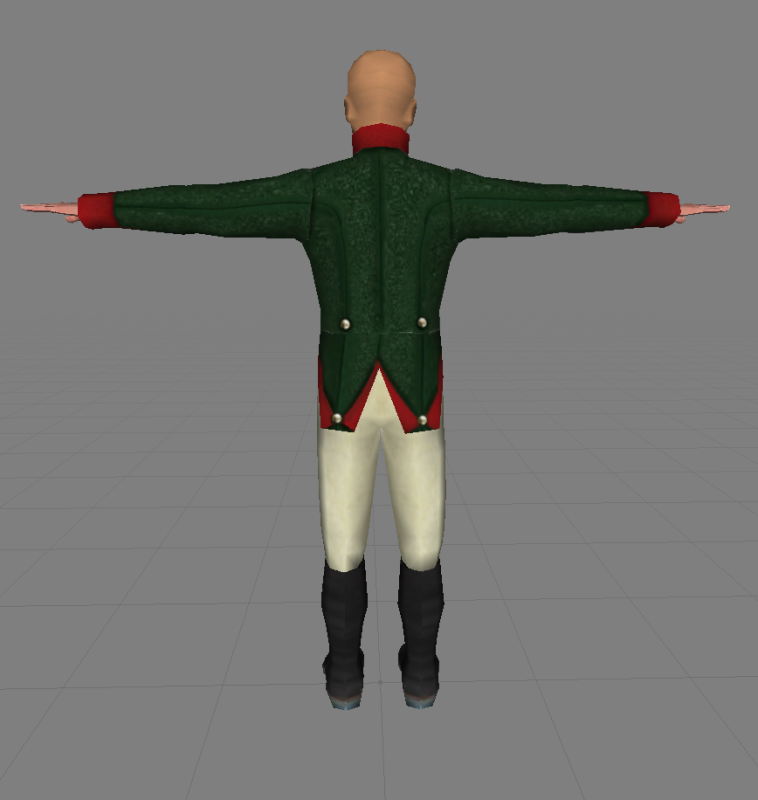
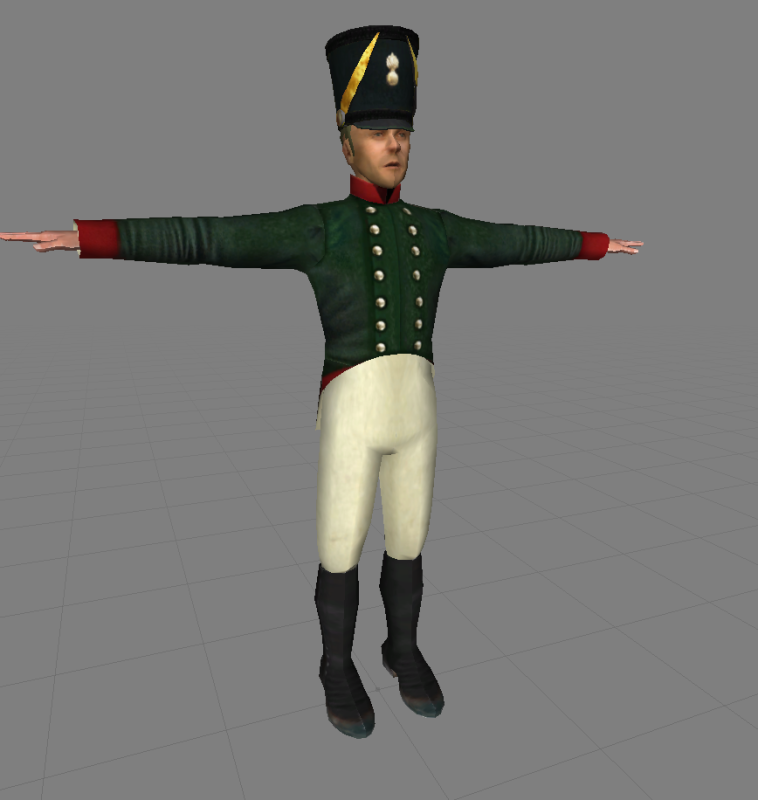
OK our soldier is taking shape now, and should be looking something like this, notice the effect our shading has had on the top of the sleeves, its provided another seam, also the neck line now has shadows, as do the cuffs and tailcoats.
CREASES & FOLDS
Now we'll talk about creases and folds in materials, there are a number of ways to do this, but first we have to take a close look at where creases and folds in clothing naturally occur. We're going to look at the sleeves, folds and creases will occur at the joints, we all know that, the elbow, the armpit and the wrist area is what we're interested in.
One way to re-create these is to make the colours of the material you are working on contast with varying shades of light and dark. Here for example I've chosen an off white wool material, I've highlighted it with white and contrasted that with grey, see below
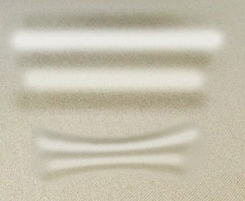
In the next image, I've manipued the shades with edit, free transform, warp, from the drop down menu in P.S. and I can further blend this in using the opasity tool on the right of my workspace in P.S. and I can take this even further by using the rubber/errasor tool and setting it to say 10 or 15% on a soft brush (pixel setting is up to you, which is the size really) and washing it over the surface of my image to blend it and fade it in perfectly.
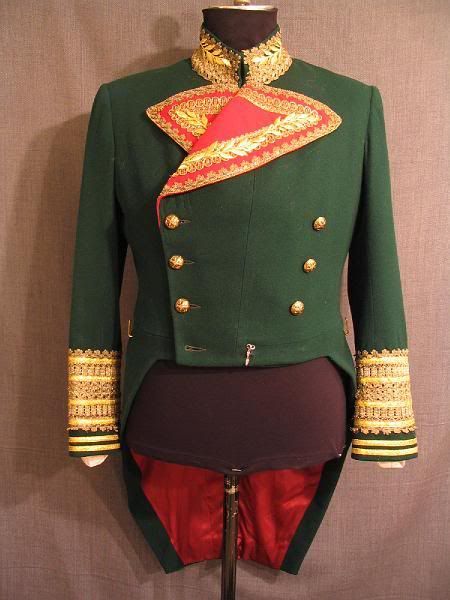
The other method I use to get folds in material is to simpley copy and paste it from pictures of uniforms, then using edit free transform, warp in P.S and using the opasity tool and the rubber as descibed above, copy and paste the piece you want and then blend it into your texture. Here's a photo I used. and below is the result

I used my lasso tool to take the part of the image that I wanted, the sleeve and the side of the green uniform, heres the result on the texture map after a little bit time spent cutting and pasting blending and rubbing.
and here it is on the model, note the small pleats at the top of the sleeve and the wear marks at the elbows, the creases and folds are completely natural as they are taken from a real garment and merely blended into the texture surface.
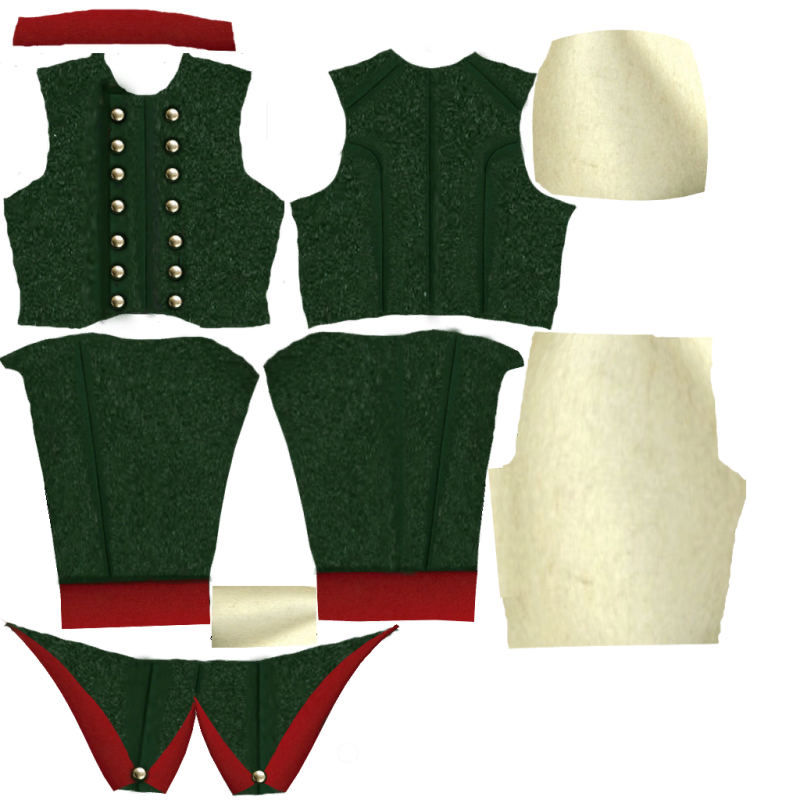
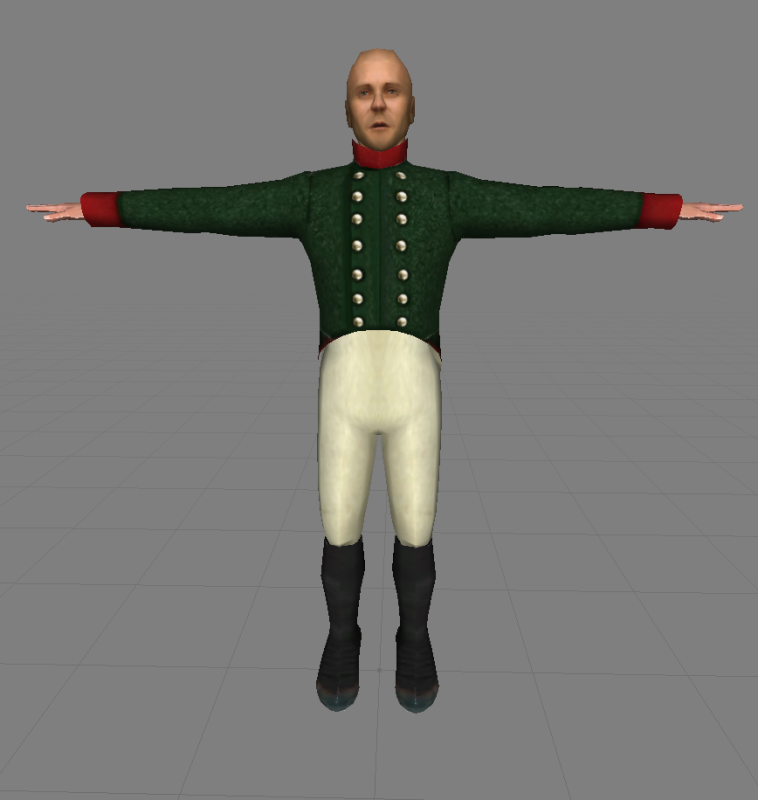
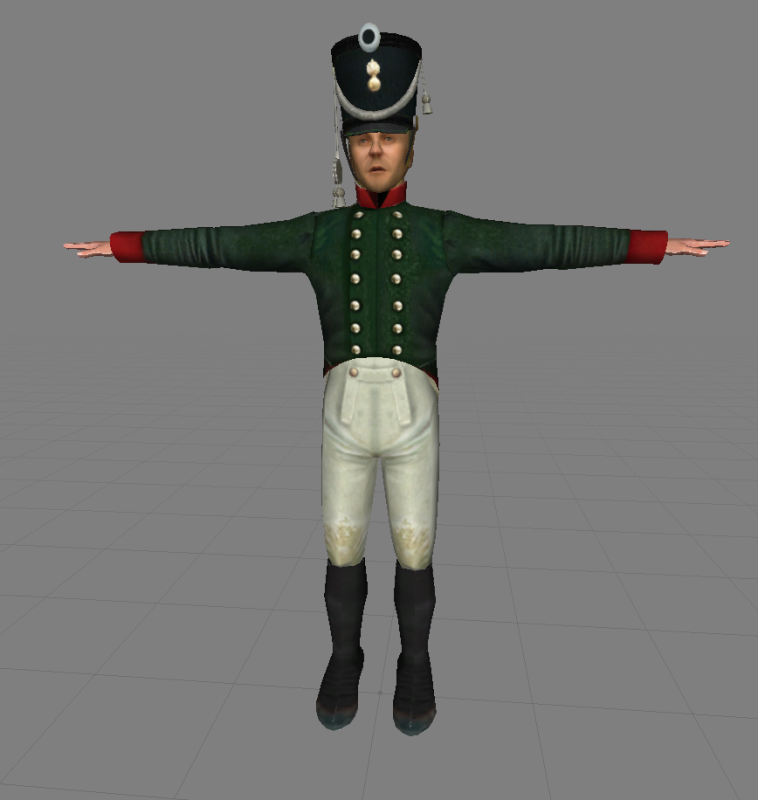
For the next stage, just repeat the process for the breeches/trousers as I've done here, I'm no artist and I never will be, all I've done is copy and paste pieces of the box art Russian soldiers above and manipulated and blended the parts I wanted into the trousers, here's what I mean take a look at the model and I've also included the texture map for you to see.
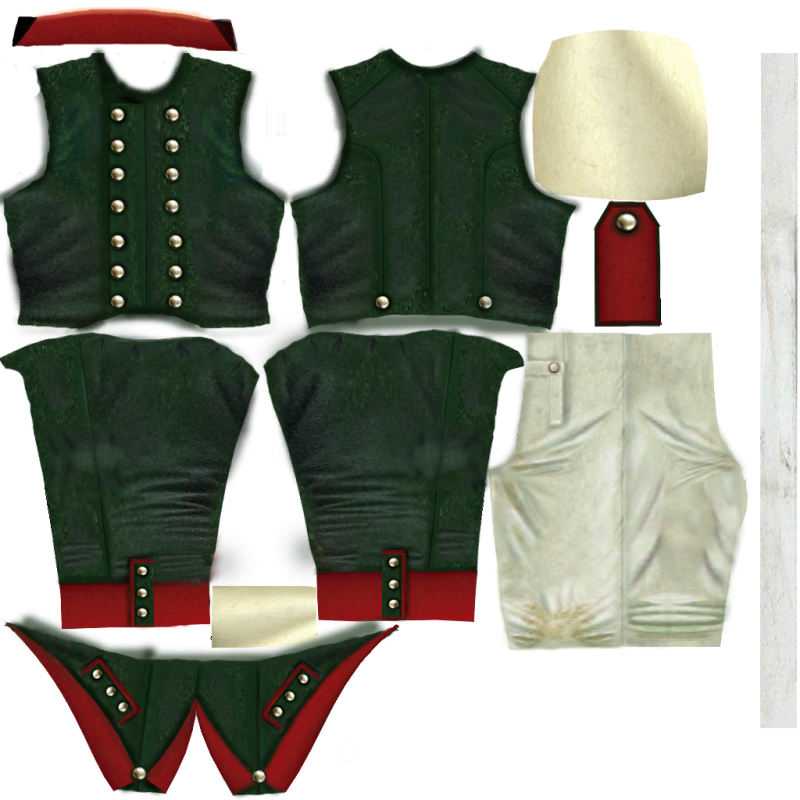
Here's the final texture map, I've filled in a little more detail added the rest of the buttons and matched in the rest of the jacket's material so it doesn't stick out as different from the rest of the blending I've done, if you're still reading this we're moving on to the second tutorial, on creating normal maps, which I promise is much shorter and not difficult at all.
Thanks for looking
Poomtang
Tools needed
Wings 3d
Photoshop (P.S.)
Smart Normal
OpenBRF
OK here's the shell model of our first Russian infantryman, it looks like nothing at the moment, but I'm going to invite you all to watch it grow into a beautiful infantry model for the Russian army, this will be a joint effort by myself and Keryyin, as I teach Keryyin some texturing tecniques, so plase keep watching as it grows.
I will show you how to texture, the way I do it, I will show how to make specular and normal maps, in fact all th parts you need to make a nice model for your own mod.
First step, once we have made/selected the model we want to texture is to start with a blanck U.V map or texture map, this one, as you can see, I've cut up into sections using Wings 3d, I have seperated the chest area, the back, the arms, both left and right are seperate, I've seperated the collar, and cuffs, the tailcoat, the tailcoat lining and the legs, this is now ready to go for texturing.
The next step is to do a little research we want to find out exactly how a Russian soldier of the Napoleonic wars looked, so simpley google it in google images and see what you can find, save the pictures you find for reference material.
OK basically, the Russian infantryman we want to make uses a green woolen tunic faced red, with white breeches make of cotten or linen. The next step is to google for swatches of green and red wool, here's some I've found.
Green wool material for the tunic, this I want to copy and paste straight onto my texture map in photoshop, to the right of your workspace there's a little tool for adjusting the opasity of you texture use this to basically see through your woolen swatch, set it to 50% and place the now transparent swatch over the chest area.
Using the edit, free transform option, adjust the size of the swatch until it completely covers the chest area. Once you have done this, trim around the edges, using you rubbe, or errasor tool, until the swatch matches the pattern of your uniform jacket chest. see below.
Repeat the process for all the main parts of the uniform, until it is completely green, once this is done, you can re-adjust the opasity back to 100%.
Here you can see I've moved on a bit and copied and pasted swatches of red military style wool and linen for the collar, cuffs, tailcoat and tailcoat lining.
I've saved my texture as a DDS and introduced it to my mod by importing the material and the texture via open BRF, I've also saved and imported my model into my mod using open BRF. Here's the result so far.
If you've been following the tutorial, your model should now look something like this.
CLOTHING SEAMS, BUTTONS & BASIC SHADING
There's a couple of ways to make these, the first is to draw the lines in black in the position you want with a solid brush in photoshop, the other and the method I prefer to follow, is to simpley copy a seam from a piece of clothing, say for example, use google images and type in green woolen coat, lots of images will pop up. Copy and paste the one that best matches your uniform coat onto your texture, then use the lasoo tool to copy the part you are interested in , in this case the seam from a sleeve. Put that seem into the position you want and rub out the remain parts of the google image you don't want.
You can use a combination of, edit, free transform, warp to manipulate the copied seam into the size and position you want, you can further use the rubber, or better still the opasity tool to blend in your seam.
Here's an image of how the seams should look on a uniform from the period, its a bit of a pain in the ass the match them all up, but this is what you are looking to achieve, You can you the brush tool to enhace the seams and provide a little bit of darker shading, more on that later.
Have a close look at the next image, here you can see that I've added buttons and some basic shading, to create the illusion of shadow on the cloth of the coat. First the buttons, find an image of a button that you like from google mages, copy and paste as described above, re-size using edit, free transform from the drop down menu in P.S.(photoshop) and position your buttons where you need them on your model.
Next go back to the layer of your texture before you pasted the first button, select a brush, I've used a soft round at 17 pixels and I've set the opasity to 75% because of the darkness of the material of the uniform. You may have to do this several times, apply your paint behind the button to make it stand out from the rest of the uniform, the soft round brush will have the effect of radiating out from behind the button, do this for every button. You can also do this behind the facing colour of the cuffs, the tailcoat as you can see here, below, all of this has the effect of creating a shadow and making the red trim stand out even more and catch the eye better. Note I've only shaded the one on the left of the uniform jacket and not the right to show the difference. Next try shading the edges around the neckline, armpits, collar and cuffs as per the second image below.
OK our soldier is taking shape now, and should be looking something like this, notice the effect our shading has had on the top of the sleeves, its provided another seam, also the neck line now has shadows, as do the cuffs and tailcoats.
CREASES & FOLDS
Now we'll talk about creases and folds in materials, there are a number of ways to do this, but first we have to take a close look at where creases and folds in clothing naturally occur. We're going to look at the sleeves, folds and creases will occur at the joints, we all know that, the elbow, the armpit and the wrist area is what we're interested in.
One way to re-create these is to make the colours of the material you are working on contast with varying shades of light and dark. Here for example I've chosen an off white wool material, I've highlighted it with white and contrasted that with grey, see below
In the next image, I've manipued the shades with edit, free transform, warp, from the drop down menu in P.S. and I can further blend this in using the opasity tool on the right of my workspace in P.S. and I can take this even further by using the rubber/errasor tool and setting it to say 10 or 15% on a soft brush (pixel setting is up to you, which is the size really) and washing it over the surface of my image to blend it and fade it in perfectly.
The other method I use to get folds in material is to simpley copy and paste it from pictures of uniforms, then using edit free transform, warp in P.S and using the opasity tool and the rubber as descibed above, copy and paste the piece you want and then blend it into your texture. Here's a photo I used. and below is the result
I used my lasso tool to take the part of the image that I wanted, the sleeve and the side of the green uniform, heres the result on the texture map after a little bit time spent cutting and pasting blending and rubbing.
and here it is on the model, note the small pleats at the top of the sleeve and the wear marks at the elbows, the creases and folds are completely natural as they are taken from a real garment and merely blended into the texture surface.
For the next stage, just repeat the process for the breeches/trousers as I've done here, I'm no artist and I never will be, all I've done is copy and paste pieces of the box art Russian soldiers above and manipulated and blended the parts I wanted into the trousers, here's what I mean take a look at the model and I've also included the texture map for you to see.
Here's the final texture map, I've filled in a little more detail added the rest of the buttons and matched in the rest of the jacket's material so it doesn't stick out as different from the rest of the blending I've done, if you're still reading this we're moving on to the second tutorial, on creating normal maps, which I promise is much shorter and not difficult at all.