Top 10 Plays of Warband Revival League
1. AE (vs Spain) - San'di'boush
08:54 - The flag has spawned in the graveyard. Sparta is positioned on the graveyard wall. If AE attack the flag (entering the graveyard) without this archer pushed, that archer will be able to free fire, which usually wins the match (e.g. http://bit.ly/30ZD211). Dume is positioned on the ladder, so AE can't raise it and push the archer from there. This tactic has been used in other matches before (e.g. 1 https://bit.ly/2SXJio6, 2 http://bit.ly/2sXHIYR), but AE's counter to this is to place a crossbowman all the way at the ninja ladder (unexpectedly), so a crossfire is setup towards the main ladder, making it easier for them to engage a fight there. Once the fight starts, Darklight has to abandon raising the flag in the graveyard to join his teammates. (If he doesn't, his teammates will be outnumbered, and AE will take the ladder and the archer's position on the wall.) AE wins the fight, helped by the crossbow crossfire, and Peter gets 4 kills in one round. They successfully outplayed Spain's strong defensive positioning around the flag.
2. Superlilli (IR vs Malta) - Legacy Town
22:13 - Superlilli's team are 0-2 down this set, and 2-5 down in the match overall. They are defending the flag as Vaegir vs Rhodoks in a closed environment. Superlilli starts by positioning himself behind the enemy infantry line to split them up, weaves towards and hits normanguy, providing an assist for Slade to get a kill. He almost gets a hit on Oliveran, but is struck by bullez. He then starts stepping around frantically, circling in between players (first clockwise, then anticlockwise), bringing his shield up to block at just the right time (avoiding a double hit), and then starts throwing out attacks - two against bullez (including a 360 double hit, while his footwork draws out a teamkill), and two to finish off Oliveran - the second of which is held slightly as he moves over to the right, so it's more difficult to block. He then challenges angrynerd, blocking his double hit and backstepping while hugging the wall to avoid a potential kick. He tries a simple feint and hold, and then blocks another double hit, which breaks his shield, possibly playing defensively to allow Kane or Rainbow (i.e. archers) to get the kill. He quickly makes sure to chase after angrynerd (who needs to close down the archers) when he switches target, so he can attack his back with a right swing from his scimitar. He blocks angrynerd's overhead, and then finishes him off with a simple left swing. This was a turning point that helped prevent IR going 2-6 down into the second map, and they ended up winning the match overall.
3. Samu (R vs Malta) - Fort of Honour
11:23 - On the mini-map, you can see Samu is fighting Habrak behind the graveyard. Samu takes him down along with two assists from cavalry, and avoids being hit by enemy cavalry. He then starts shooting into the graveyard unopposed. He possibly hits Oliveran with his first shot. He misses some shots while his teammate Menethil is surrounded and killed. He then shoots normanguy dead, as he was dismounted on the ground, and follows up immediately with a headshot on Oliveran, who was turned around by Squertmen. He comes back out from behind the graveyard and lands yet another headshot. He also gets the final kill by shooting down Popo for 5 kills in one round.
4. Peter (AE vs Spain) - Legacy Town
04:07 - He gets a hit on Charlini with a right swing, and starts moving in between Zilent and j0na. He then holds an overhead towards Zilent but weaves past him to take out Asediado, who was caught switching his weapon. He keeps the pressure on Zilent and moves around him to let Shemaforash land an assist, and then finishes him off himself. He keeps his shield up towards Dume as he passes by. He sees that Dume is blocked and will come back the way he came, so he takes out a polearm to trap Dume in the corner, rearing him up with the spear. This allows axL to make an assist on Dume, and Peter motions his spear in an arc to take him out. He damages SirAlecks's horse, and then spears DarkLight to take him down to half health. He does another arc-like motion with the spear in close proximity to land a second hit on DarkLight, allowing axL to finish him. He switches to two-handed with the spear and manages to block against j0na while attempting a kick. He gets teamshot by LeRoux. Shemaforash provides an assist on j0na, which allows Peter to finish him off for 4 kills in one round.
5. Gibby (OIDA vs AE) - Fort of Honour
51:26 - OIDA advance on AE's flag as Swadia vs Nords in the last set of the Grand Final. They avoid taking the fight on the platform, to make use of their cavalry's long awlpikes on the ground, and considering they'd quickly get their shields broken by axes. With the Nord infantry still on the stairs, the Swadian infantry slip past them to push the enemy archer out of his position by the well. Gibby takes a hit on the back, but his heavy armour (which he afforded by buying a cheaper helmet) keeps his health high. He spins with his shield up and steps around the horse to survive while kills go left and right for both teams. He blocks a double hit, but gets his shield broken by a Nord axe. While still alive, his position in the fight allows Janczar and Matt to pick up kills on the enemy infantry facing him. He picks up a Heavy Round Shield and returns to the well area just in time to dismount axL by reaching out with a right swing. Instead of rushing for the kill on axL, he goes and takes out Bloody Death, who was approaching on a dismounted Janczar. He goes to jump over Janczar to protect him from axL who's got up. He picks up a Nord javelin from the ground and gets a headshot on Shemaforash. He gets an assist on Scar to bring him down along with Matt. He goes for a right swing to try reaching around Janczar and get a hit on axL, who is eventually brought down. Securing this round helped to put a stop to AE's very possible comeback, and OIDA went on to win the Grand Final.
6. Charlini (Spain vs R) - Mountain Fortress
1:01:57 - Charlini leads his team as Rhodoks vs Vaegir, forcing the fight in a closed area, while the flag spawns elsewhere. He sidesteps from the engagement to protect the backs of his infantry teammates, readying a spear attack towards an enemy infantry, and then turns to rear an incoming cavalry he had his eye on. He switches to a two-handed weapon and damages the cavalry. He takes out Menethil with a quick feint and hold. He immediately turns to the nearby cavalry to block both their lances and quickly takes out Khani. He heads off into the alley but is aware of the cavalry approaching behind, so he immediately turns and cleanly takes out the rider with a jump slash. He then takes out his shield to block arrows. He moves up to the archer and takes out his two-handed weapon again. He keeps attacking him until he's dead. He then goes off to possibly pick up some dropped items, but returns to take out the dismounted cavalry for 5 kills in one round.
7. Matt (Oida vs IR) - Verloren
 youtu.be
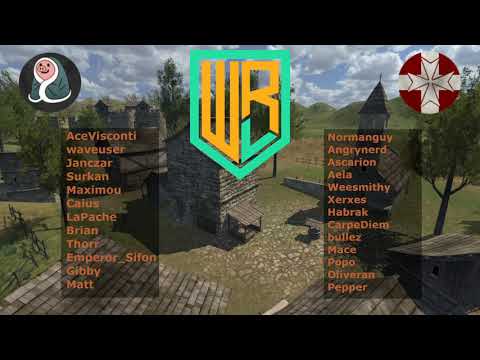
12:04 - Matt is positioned on the graveyard wall. His team ends up 4v6, but Matt shoots down both normanguy and Ascarion to make it even again. Popo advances on him on the wall, so he drops off it. His teammate Brian plays defensively while outnumbered to survive and allow Matt to get more shots in. Matt shoots down Weesmithy and runs further away. His teammate Janczar gets dismounted, but Brian protects him while he's getting up. The distance between Matt and angrynerd (who's advancing on him) means he has time to shoot down Oliveran, who turned to help Popo fight Brian 2v1. Janczar fights off angrynerd, so Matt can now shoot into two 1v1 duels. He gets the final shot on Popo for 5 kills in one round.
8. Scar (AE vs IR) - Fort of Honour

25:12 - AE as Nords are face-to-face with the Sarranids, who stand defending the flag. Scar is hiding behind a wall out of sight, readying a javelin. It looks as though only M is throwing javelins off to the right, so one Sarranid directs his shield there. Scar then peeks from behind the wall at the left and quickly throws a javelin past the shield for a one-hit headshot. Nords advance closer, and the Sarranids look to start engaging, but Scar crosses to the right side and deals out another javelin headshot. He then keeps away from the engagement, but seeing the team separated, he attacks the remaining infantry from behind. Despite some nice blocking from Superlilli, who's trapped in the corner, Scar kills him with an overhead. He goes for a javelin jump shot over Rainbow's shield, but fumbles as Rainbow hits him twice and kicks him. Scar didn't take much damage and takes out Rainbow with a quick left swing for 4 kills in one round.
9. Angrynerd (Malta vs Spain) - Castellum
 youtu.be
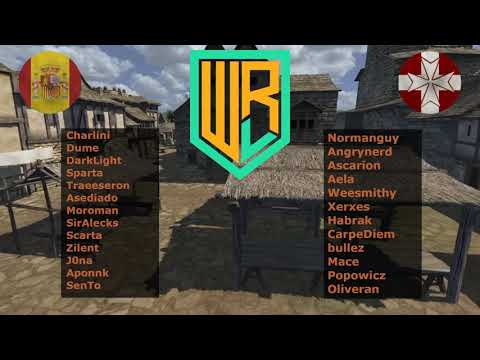
30:42 - Angrynerd has his spear out to fend off cavalry, but he uses it to stab Scarta to death instead. He picks up a dropped awlpike and moves onto the flag, while Spain elsewhere bring it back to 4v4. He rears up SirAlecks, dismounts him, and kills him with the awlpike. He returns to the flag to make sure it stays higher for his team. He keeps an eye on cavalry and rears up Asediado while also killing him. He avoids taking damage from Dume's long awlpike and stays close enough to the flag to return to it. It comes down to a 1v1 fight. He could shield up until the timer runs out, but because Dume has to play aggressive (since the flag is higher) he counter-spams and kills him for 4 kills in one round.
10. Menethil (R vs Malta) - Fort of Honour
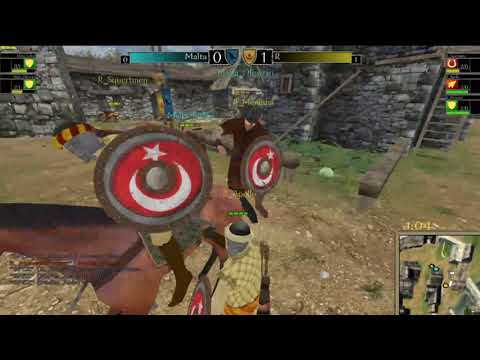
17:46 - Menethil is dueling Aela 1v1. He walks away as if to switch target but lures her in with his signature turn-and-kick, after which his axe brings her to low health. The rest of his team fumbles and dies, so he finds himself alone against three players. He quickly weaves past normanguy and takes out angrynerd. He immediately turns back to Aela with a right swing to take her out too. Normanguy starts kicking and spinning around with his lance, but Menethil sidesteps it and takes him out with an overhead for a quick 1v3 clutch.
Honourable Mentions:
Peter
 youtu.be
OGL
Maximou
Shemaforash
Khani/Sparta

 youtu.be
Azan
 youtu.be
Matt
 AugustusWamper
 SenTo
SenTo

 youtu.be
Popo

 youtu.be
1. AE (vs Spain) - San'di'boush
08:54 - The flag has spawned in the graveyard. Sparta is positioned on the graveyard wall. If AE attack the flag (entering the graveyard) without this archer pushed, that archer will be able to free fire, which usually wins the match (e.g. http://bit.ly/30ZD211). Dume is positioned on the ladder, so AE can't raise it and push the archer from there. This tactic has been used in other matches before (e.g. 1 https://bit.ly/2SXJio6, 2 http://bit.ly/2sXHIYR), but AE's counter to this is to place a crossbowman all the way at the ninja ladder (unexpectedly), so a crossfire is setup towards the main ladder, making it easier for them to engage a fight there. Once the fight starts, Darklight has to abandon raising the flag in the graveyard to join his teammates. (If he doesn't, his teammates will be outnumbered, and AE will take the ladder and the archer's position on the wall.) AE wins the fight, helped by the crossbow crossfire, and Peter gets 4 kills in one round. They successfully outplayed Spain's strong defensive positioning around the flag.
2. Superlilli (IR vs Malta) - Legacy Town
22:13 - Superlilli's team are 0-2 down this set, and 2-5 down in the match overall. They are defending the flag as Vaegir vs Rhodoks in a closed environment. Superlilli starts by positioning himself behind the enemy infantry line to split them up, weaves towards and hits normanguy, providing an assist for Slade to get a kill. He almost gets a hit on Oliveran, but is struck by bullez. He then starts stepping around frantically, circling in between players (first clockwise, then anticlockwise), bringing his shield up to block at just the right time (avoiding a double hit), and then starts throwing out attacks - two against bullez (including a 360 double hit, while his footwork draws out a teamkill), and two to finish off Oliveran - the second of which is held slightly as he moves over to the right, so it's more difficult to block. He then challenges angrynerd, blocking his double hit and backstepping while hugging the wall to avoid a potential kick. He tries a simple feint and hold, and then blocks another double hit, which breaks his shield, possibly playing defensively to allow Kane or Rainbow (i.e. archers) to get the kill. He quickly makes sure to chase after angrynerd (who needs to close down the archers) when he switches target, so he can attack his back with a right swing from his scimitar. He blocks angrynerd's overhead, and then finishes him off with a simple left swing. This was a turning point that helped prevent IR going 2-6 down into the second map, and they ended up winning the match overall.
3. Samu (R vs Malta) - Fort of Honour
11:23 - On the mini-map, you can see Samu is fighting Habrak behind the graveyard. Samu takes him down along with two assists from cavalry, and avoids being hit by enemy cavalry. He then starts shooting into the graveyard unopposed. He possibly hits Oliveran with his first shot. He misses some shots while his teammate Menethil is surrounded and killed. He then shoots normanguy dead, as he was dismounted on the ground, and follows up immediately with a headshot on Oliveran, who was turned around by Squertmen. He comes back out from behind the graveyard and lands yet another headshot. He also gets the final kill by shooting down Popo for 5 kills in one round.
4. Peter (AE vs Spain) - Legacy Town
04:07 - He gets a hit on Charlini with a right swing, and starts moving in between Zilent and j0na. He then holds an overhead towards Zilent but weaves past him to take out Asediado, who was caught switching his weapon. He keeps the pressure on Zilent and moves around him to let Shemaforash land an assist, and then finishes him off himself. He keeps his shield up towards Dume as he passes by. He sees that Dume is blocked and will come back the way he came, so he takes out a polearm to trap Dume in the corner, rearing him up with the spear. This allows axL to make an assist on Dume, and Peter motions his spear in an arc to take him out. He damages SirAlecks's horse, and then spears DarkLight to take him down to half health. He does another arc-like motion with the spear in close proximity to land a second hit on DarkLight, allowing axL to finish him. He switches to two-handed with the spear and manages to block against j0na while attempting a kick. He gets teamshot by LeRoux. Shemaforash provides an assist on j0na, which allows Peter to finish him off for 4 kills in one round.
5. Gibby (OIDA vs AE) - Fort of Honour
51:26 - OIDA advance on AE's flag as Swadia vs Nords in the last set of the Grand Final. They avoid taking the fight on the platform, to make use of their cavalry's long awlpikes on the ground, and considering they'd quickly get their shields broken by axes. With the Nord infantry still on the stairs, the Swadian infantry slip past them to push the enemy archer out of his position by the well. Gibby takes a hit on the back, but his heavy armour (which he afforded by buying a cheaper helmet) keeps his health high. He spins with his shield up and steps around the horse to survive while kills go left and right for both teams. He blocks a double hit, but gets his shield broken by a Nord axe. While still alive, his position in the fight allows Janczar and Matt to pick up kills on the enemy infantry facing him. He picks up a Heavy Round Shield and returns to the well area just in time to dismount axL by reaching out with a right swing. Instead of rushing for the kill on axL, he goes and takes out Bloody Death, who was approaching on a dismounted Janczar. He goes to jump over Janczar to protect him from axL who's got up. He picks up a Nord javelin from the ground and gets a headshot on Shemaforash. He gets an assist on Scar to bring him down along with Matt. He goes for a right swing to try reaching around Janczar and get a hit on axL, who is eventually brought down. Securing this round helped to put a stop to AE's very possible comeback, and OIDA went on to win the Grand Final.
6. Charlini (Spain vs R) - Mountain Fortress
1:01:57 - Charlini leads his team as Rhodoks vs Vaegir, forcing the fight in a closed area, while the flag spawns elsewhere. He sidesteps from the engagement to protect the backs of his infantry teammates, readying a spear attack towards an enemy infantry, and then turns to rear an incoming cavalry he had his eye on. He switches to a two-handed weapon and damages the cavalry. He takes out Menethil with a quick feint and hold. He immediately turns to the nearby cavalry to block both their lances and quickly takes out Khani. He heads off into the alley but is aware of the cavalry approaching behind, so he immediately turns and cleanly takes out the rider with a jump slash. He then takes out his shield to block arrows. He moves up to the archer and takes out his two-handed weapon again. He keeps attacking him until he's dead. He then goes off to possibly pick up some dropped items, but returns to take out the dismounted cavalry for 5 kills in one round.
7. Matt (Oida vs IR) - Verloren

WRL: Commando OIDA vs Malta
WRL: Commando OIDA vs Malta -- Watch live at https://www.twitch.tv/thecardboardbox3
12:04 - Matt is positioned on the graveyard wall. His team ends up 4v6, but Matt shoots down both normanguy and Ascarion to make it even again. Popo advances on him on the wall, so he drops off it. His teammate Brian plays defensively while outnumbered to survive and allow Matt to get more shots in. Matt shoots down Weesmithy and runs further away. His teammate Janczar gets dismounted, but Brian protects him while he's getting up. The distance between Matt and angrynerd (who's advancing on him) means he has time to shoot down Oliveran, who turned to help Popo fight Brian 2v1. Janczar fights off angrynerd, so Matt can now shoot into two 1v1 duels. He gets the final shot on Popo for 5 kills in one round.
8. Scar (AE vs IR) - Fort of Honour

25:12 - AE as Nords are face-to-face with the Sarranids, who stand defending the flag. Scar is hiding behind a wall out of sight, readying a javelin. It looks as though only M is throwing javelins off to the right, so one Sarranid directs his shield there. Scar then peeks from behind the wall at the left and quickly throws a javelin past the shield for a one-hit headshot. Nords advance closer, and the Sarranids look to start engaging, but Scar crosses to the right side and deals out another javelin headshot. He then keeps away from the engagement, but seeing the team separated, he attacks the remaining infantry from behind. Despite some nice blocking from Superlilli, who's trapped in the corner, Scar kills him with an overhead. He goes for a javelin jump shot over Rainbow's shield, but fumbles as Rainbow hits him twice and kicks him. Scar didn't take much damage and takes out Rainbow with a quick left swing for 4 kills in one round.
9. Angrynerd (Malta vs Spain) - Castellum

WRL Week1 : Malta vs ESP
WRL Week1 : Malta vs ESP Co-commentary: Aeronwen -- Watch live at https://www.twitch.tv/thecardboardbox3
30:42 - Angrynerd has his spear out to fend off cavalry, but he uses it to stab Scarta to death instead. He picks up a dropped awlpike and moves onto the flag, while Spain elsewhere bring it back to 4v4. He rears up SirAlecks, dismounts him, and kills him with the awlpike. He returns to the flag to make sure it stays higher for his team. He keeps an eye on cavalry and rears up Asediado while also killing him. He avoids taking damage from Dume's long awlpike and stays close enough to the flag to return to it. It comes down to a 1v1 fight. He could shield up until the timer runs out, but because Dume has to play aggressive (since the flag is higher) he counter-spams and kills him for 4 kills in one round.
10. Menethil (R vs Malta) - Fort of Honour

17:46 - Menethil is dueling Aela 1v1. He walks away as if to switch target but lures her in with his signature turn-and-kick, after which his axe brings her to low health. The rest of his team fumbles and dies, so he finds himself alone against three players. He quickly weaves past normanguy and takes out angrynerd. He immediately turns back to Aela with a right swing to take her out too. Normanguy starts kicking and spinning around with his lance, but Menethil sidesteps it and takes him out with an overhead for a quick 1v3 clutch.
Honourable Mentions:
Peter

Warband Revival League | AE vs Malta | Week 2
Mount & Blade: Warband Competitive League Tournament, it's gud.
Maximou
Shemaforash
Khani/Sparta

WRL WEEK 3 : AE VS OIDA // ESPAÑA VS REDEMPTION
Broadcasted live on Twitch -- Watch live at https://www.twitch.tv/warbandparatodos

WRL 2020 Quarterfinal: Apis Europae vs España
Full Quarterfinal between AE and ES¨P of the WRL tournament. Apologies for the lack of spectator mode during the final map. Co-caster: Kane -- Watch live at ...


WRL Week1 : Malta vs ESP
WRL Week1 : Malta vs ESP Co-commentary: Aeronwen -- Watch live at https://www.twitch.tv/thecardboardbox3

WRL 2020 Quarterfinal: IR vs Malta
WRL 2020 Quarterfinal: IR vs Malta -- Watch live at https://www.twitch.tv/thecardboardbox3
Last edited:

