Some time ago my friend RawnRawn had the idea to make a warband guide, which mainly focuses on the mechanics behind the game.
It was finished at the end of december 2015 and was published as a steamguide right after. http://steamcommunity.com/sharedfiles/filedetails/?id=580035086
As everyone doesn't use steam, we as CCC decided to also publish the guide here. It includes information which many of you people might not be aware of.
The formatting is kept close to original and all the text is original, written by RawnRawn. Personal thanks to Chatnoir for the help with formatting.
As TW forums only let you post 3 embedded youtube videos per topic, we changed it so that you need to click the images to get on the actual youtube site.
Enjoy the guide.

0. Natural Movement
1. Momentum and Attack Charging
2. Attack Reach
3. Armour
4. Damage Types
5. Special Weapon Attributes
6. Getting Hit
7. Stunning
8. Bypassing Shields with Projectiles
9. Chambers
General tips and tricks
End and credits
[anchor=tag1]0. Natural Movement
Let's start by looking around! I know it may sound silly but what you will notice is your character turning faster the faster you move your mouse, then when you try turning 180 degrees in a quarter of a second your character take a brief moment to catch up. Have you tried turning your whole body 180 degrees in a combat ready stance in a quarter of a second in real life? Unless you're an insect I reckon you'll fail, so Warband has what I'd call a natural body turning speed, you cannot turn quite as fast as you can move your mouse. If you're trying to bait someone into attacking you in the back but surprise those in the last second by turning around and pulling some mischief you'll need to take the time to actually turn around. Because of this you are able to pull some mighty mean manoeuvres, if you ever find yourself behind your opponent try sticking to their back and move with them while stabbing them in the butt.
You have a free look button you can utilize to look around you without letting anyone else know you can see them as you have their backs against them, also useful for peeking around corners and viewing your outfit. There is a button which enables you to zoom a fair distance and when using ranged weapons the crosshair expand to give you an indication of the accuracy falloff. Lastly you can control the distance of the camera behind your character. Further away for superior peripheral vision or closer for a more focused view. The last function is hidden and does not show up in the controls but the buttons are - for zooming out and + for zooming in.
[anchor=tag2]1. Momentum and Attack Charging
Mount and Blade games are the first (to my knowledge) to implement a real world momentum system in combat which is one of the main things which makes the melee combat in this game unique.
If you try punching someone in the face when they are in front of you while running backwards you’re gonna have a hard time doing any significant damage to them.
In Warband you can kill your opponent with one strike or it may take you 10 with the same weapon. What factors into your attack are the initial damage values your weapon has (the number you see when selecting the weapon in the equipment screen), the direction and speed of your movement which increases or reduces your swing speed as well as the way you turn your upper body using your mouse when swinging. You have three hitboxes you can connect with on your opponent that will do different damage depending on where you hit and armour that applies to those specific locations, I will go more in depth in the armour section.
For ranged weapons your damage depends on the distance you have between you and your opponent as well as what direction they are moving and how fast, if an opponent is riding towards you at the fastest pace you’ll deal a lot of damage to horse and rider but when the horse has sped past you and is heading away you can throw a javelin in the back of their helmetless head and they may survive it. Projectiles speed factors into it as well, out of the ranged weapons the throwing axes have the slowest projectile speed so the damage output would suffer more if your opponent is going away from you.
Attack charging: Depending on how long you hold your attack before releasing it you have the potential to do more damage than releasing it as soon as it’s ready. (by just tapping the left mouse button) If you hold it for a second or two (depending on the weapon speed) you’ll do the maximum potential damage for the weapon as well as increasing the stunning and block crushing ability of the weapon if it’s wielded in both hands in an overhead swing (more on that in the stunning and special weapon attributes sections). Holding the weapon’s attack for an eternity before releasing it will allow you a damage boost beyond releasing immediately but not as great as holding it for a brief moment.
[anchor=tag3]2. Attack Reach
Weapon range factors into your damage, say if you hit with a short sword you'll always hit with the effective part of the weapon, but if it's a long weapon and you hit at close range the damage will be reduced. To put it into perspective a 3 meter long weapon would not be as effective at 1 meter range as a 2 meter long weapon would even though the rest of the stats would be the same. You may think that attacking with a 1 meter weapon would yield the best result but no, as you connect with the very end of your weapon it would just scratch your opponent, to transmit the largest part of kinetic energy into your opponent at 1 meter range I suggest a 150 cm long weapon.
Finally when fighting indoors you gotta make sure you’ve got room to swing your weapon, you cannot swing through stone walls strangely enough, thrusting or using overheads against your opponent in a narrow portion of a Swadian castle would be more sensible than trying to swing left and right, those stone walls won’t budge.
[anchor=tag4]3. Armour
It protects you, not too hard to work out but it saves lives and it’s worth encumbering yourself with it. The body armour you’ll see players with a bit of brain in their heads wearing protects them with 18 to 26 at the start of a map. Cavalry and archers tend to have lighter armour for cavalry need to spend denars on their horse and archers tend to spend it on their bows and arrows. Armour is separated into three zones: Head, body and legs. Hand armour gives bonus protection to your body and body armours can give additional protection to your legs. Your head armour is only dependant on your head wear though, and considering that’s the critical spot I heavily suggest getting a helmet made of metal, no I do not care if you want to be a main protagonist in an action film, people without helmets died in historical battles.
As cavalry it is a good idea to spend more money on leg armour, infantry hitting your horse will most likely also hit you in the legs with swings. Because of your higher posture you will rarely get hit in the head so helmets are less important to you. As an infantry you want to have a good amount of head armour, skilled infantry will aim for the head with their melee attacks and with a really good helmet you may even survive a headshot by an archer.
To overcome armour you can trust in Mother Fortuna or make your own fortune using piercing and blunt weapons. The armour in Warband is random, it protects you with 50-100% meaning that hitting them with a blade over and over again in the same angle with the same momentum will produce different results. It is the only factor which is random when it comes to the damage that is dealt and personally I do not wish to see Taleworlds repeat the same mechanic in Warband II.
[anchor=tag5]4. Damage Types
There are three of them, cutting, piercing and blunt(ing?). They have different properties, let’s start with the cutting one which is applied to bladed weapons with a cutting edge such as swords, axes, sabres and cleavers. Cutting damage is the worst at ignoring armour but the best at shattering shields, axes deal additional damage to shields along with their high cutting damage. Cutting damage cannot be made by thrusts.
Piercing damage is applied to all ranged weapons (except for throwing axes) and ignores armour by 65%. It is the worst damage type for shattering shields but high piercing ranged weapons can penetrate shields at certain ranges and hit the one holding a shield with a reduced impact than a hit without needing to penetrate the shield first (more on that later). Piercing damage is done mainly by thrusting with melee weapons but there are a few swinging piercing weapons such as sickles, spiked clubs and the Morningstar.
Blunt weapons ignores armour by 50%, in addition to that they have a random chance of knocking your opponent down if their base damage exceeds 20. In single player blunt weapons are guaranteed to knock your opponent unconscious rather than killing them allowing for capture.
blunt weapons are maces, hammers, fists and horse hooves trampling you over.
[anchor=tag6]5. Special Weapon Attributes
One handed, two handed, polearm and throwing axes are given the “bonus to shield” attribute which allow them to shatter shields using fewer hits. The resistance stat of a shield, its health and the shield skill of the user will determine how much damage a shield can withstand before breaking.
Some heavier two handed and polearm hafted weapons have a negative “unbalanced” attribute which means they have an increased recovery time than other weapons when attacking. A weapon with the same speed but without the unbalanced attribute would be quicker at consecutively attacking than the weapon with the unbalanced attribute.
[anchor=tag7]6. Getting Hit
Unless you’re me on a Saturday night pumped up by tea and cookies you’ll eventually get hit on the battlefield. Depending on the type of weapon you get hit by and mother fortuna you’re staggered in different ways.
Regular: Whatever action your character was doing is interrupted but you’re free to use your lower body, one handed cutting weapons will most likely have this impact on you.
Immobilize: Unable to use neither lower nor upper body for anything in a moment. This is attributed to all polearms (with a few exceptions) but not two handed weapons, heavy ranged weaponry have this effect as well.
Destabilize: This is a hit with so much force that it causes your character to stumble. In this moment you’re unable to move, attack nor block until you’ve regained your balance. If you’re hit in the back you will stumble forward, hits from the side will cause you to stumble sideways. If you’re destabilized in melee you could be hit again by the same opponent if the weapon they are using is quick enough. This is caused by kicks, attacks by polearms and ranged projectiles, cannot be caused by one handed, two handed weapons nor horse hooves. A popular combo is the so called kick slash which requires you to follow up with an attack after kicking your opponent (default key: E), for this to be successful you need to release your attack as soon as both your feet are on the ground, doing it sooner will cause your attack to cancel, doing it too late will allow your opponent to block it.
[anchor=tag8]7. Stunning
This is a mechanic which even veterans may not be aware off. Stunning in this case is the act of disabling your opponents defence. It functions differently depending on if it’s manual blocking or blocking done with a shield.
How it works is that whenever you’re using a weapon in two hands your overhead attacks has the ability to stun your opponents guard. When stunned your opponent has got a moment where he/she is unable to attack and they are unable to block another attack.
[anchor=tag9]8. Bypassing Shields with Projectiles
This section is dedicated to the boys and girls with the bows, crossbows and throwing weapons hailing from first person shooter games where those obnoxious shields are not present.
[anchor=tag10]9. Chambers
Now for the cool stuff, I’m gonna teach you how to be a badass and block attacks without touching the right mouse button!
[anchor=tag11]General tips and tricks
This is not really a section on its own as it does not relate to anything in particular but these tricks could prove useful in some situations.
[anchor=tag12]End and credits
There you go, now you're ready to go out and take on the world! Oh and one last thing:
It was finished at the end of december 2015 and was published as a steamguide right after. http://steamcommunity.com/sharedfiles/filedetails/?id=580035086
As everyone doesn't use steam, we as CCC decided to also publish the guide here. It includes information which many of you people might not be aware of.
The formatting is kept close to original and all the text is original, written by RawnRawn. Personal thanks to Chatnoir for the help with formatting.
As TW forums only let you post 3 embedded youtube videos per topic, we changed it so that you need to click the images to get on the actual youtube site.
Enjoy the guide.
This guide is aimed at rookies and veterans, mainly focusing on the melee combat of the game but there are some information useful to archers and cavalry as well.
So you’re ready to dive head first into the cold and unforgiving land of Calradia? Worse yet you may be considering to take your skills to multiplayer?
Fear not for this guide will teach you everything you need to know about combat that the tutorial does not.
So you’re ready to dive head first into the cold and unforgiving land of Calradia? Worse yet you may be considering to take your skills to multiplayer?
Fear not for this guide will teach you everything you need to know about combat that the tutorial does not.
0. Natural Movement
1. Momentum and Attack Charging
2. Attack Reach
3. Armour
4. Damage Types
5. Special Weapon Attributes
6. Getting Hit
7. Stunning
8. Bypassing Shields with Projectiles
9. Chambers
General tips and tricks
End and credits
[anchor=tag1]0. Natural Movement
Let's start by looking around! I know it may sound silly but what you will notice is your character turning faster the faster you move your mouse, then when you try turning 180 degrees in a quarter of a second your character take a brief moment to catch up. Have you tried turning your whole body 180 degrees in a combat ready stance in a quarter of a second in real life? Unless you're an insect I reckon you'll fail, so Warband has what I'd call a natural body turning speed, you cannot turn quite as fast as you can move your mouse. If you're trying to bait someone into attacking you in the back but surprise those in the last second by turning around and pulling some mischief you'll need to take the time to actually turn around. Because of this you are able to pull some mighty mean manoeuvres, if you ever find yourself behind your opponent try sticking to their back and move with them while stabbing them in the butt.
You have a free look button you can utilize to look around you without letting anyone else know you can see them as you have their backs against them, also useful for peeking around corners and viewing your outfit. There is a button which enables you to zoom a fair distance and when using ranged weapons the crosshair expand to give you an indication of the accuracy falloff. Lastly you can control the distance of the camera behind your character. Further away for superior peripheral vision or closer for a more focused view. The last function is hidden and does not show up in the controls but the buttons are - for zooming out and + for zooming in.
[anchor=tag2]1. Momentum and Attack Charging
Mount and Blade games are the first (to my knowledge) to implement a real world momentum system in combat which is one of the main things which makes the melee combat in this game unique.
If you try punching someone in the face when they are in front of you while running backwards you’re gonna have a hard time doing any significant damage to them.
In Warband you can kill your opponent with one strike or it may take you 10 with the same weapon. What factors into your attack are the initial damage values your weapon has (the number you see when selecting the weapon in the equipment screen), the direction and speed of your movement which increases or reduces your swing speed as well as the way you turn your upper body using your mouse when swinging. You have three hitboxes you can connect with on your opponent that will do different damage depending on where you hit and armour that applies to those specific locations, I will go more in depth in the armour section.
 | 
| You have to keep in mind that your maximum damage lies at the middle of your attack, hitting your opponent when you’ve just started and their hugging you will result in a fluff (your weapon bounces off without doing much damage) unless A) your opponent is wearing terrible armour or B) you’re using a short and high damaging weapon (like an axe) or any variation between the two. The same goes for hitting your opponent at the end of your attack when you’ve exhausted all momentum in the attack, your weapon will bounce off and leave you with a longer recovery time than if you would have just missed your opponent, I will go more in depth about that in the "Getting Hit" section. |
For ranged weapons your damage depends on the distance you have between you and your opponent as well as what direction they are moving and how fast, if an opponent is riding towards you at the fastest pace you’ll deal a lot of damage to horse and rider but when the horse has sped past you and is heading away you can throw a javelin in the back of their helmetless head and they may survive it. Projectiles speed factors into it as well, out of the ranged weapons the throwing axes have the slowest projectile speed so the damage output would suffer more if your opponent is going away from you.
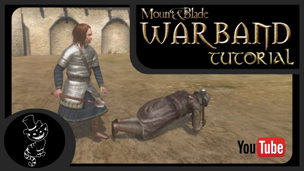
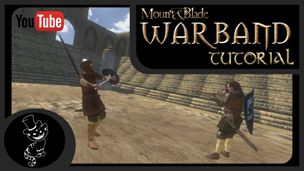
| So, if you want to deliver the most serious whooping one could ever give out I suggest you hop onto a courser with a heavy lance and couch it into some unfortunate creature's face while riding at the highest pace. But if you simply wish to deal more damage with each swing on a daily basis here are some tips to follow: Strive to hit your opponent at the middle of your attack, which is when your weapon is right in front of your body with a swing and when your arms are almost fully extended with a thrust. Move your body with your swing, if you swing to the left from right you should move to the left, when thrusting you should walk right into your opponent starting from a suitable distance, getting the right distance when thrusting is especially important when using a polearm and shield. Hitting someone while falling will not increase the damage dealt, vertical movement has no impact on damage. |
|  |
Attack charging: Depending on how long you hold your attack before releasing it you have the potential to do more damage than releasing it as soon as it’s ready. (by just tapping the left mouse button) If you hold it for a second or two (depending on the weapon speed) you’ll do the maximum potential damage for the weapon as well as increasing the stunning and block crushing ability of the weapon if it’s wielded in both hands in an overhead swing (more on that in the stunning and special weapon attributes sections). Holding the weapon’s attack for an eternity before releasing it will allow you a damage boost beyond releasing immediately but not as great as holding it for a brief moment.
[anchor=tag3]2. Attack Reach
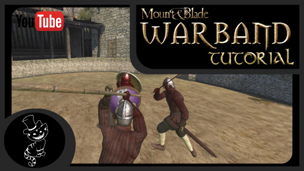
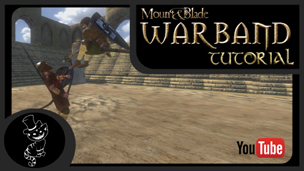
| Now this may come out of common sense from visually perceiving what’s going on but I figure I might as well put it in here. The maximum reach of your weapon is determined where you aim, if you and your opponent are using the same weapon but you’re aiming for the feet whilst your opponent is aiming for your chest with the same swing at the same time your attack will not reach him but his will reach your head because you’ll be bending down trying to hit his feet. So where should you aim to get the maximum reach? That depends on the weapon and the attack, with a one handed weapon swinging from right to left you’ll have the longest reach at chest height, so if your goal is to hit your opponent (which I reckon it is) aim for the chest. With a swing from left to right you’ll be holding your weapon close to your left ear, it’s much more appropriate to be aiming for your opponents head with this swing, with an overhead attack there is nothing you can do to manipulate your range nor the attack momentum provided you and your opponent are on even ground. Roughly the same goes for two handed weapons and polearms except for the swing from left to right, with polearms and two handed weapons you should aim at chest height for maximum range. With thrusts it’s a different matter, a one handed weapon thrusts at chest height while a two handed weapon thrusts at head height. A polearm wielded with one hand thrusts at stomach height while a polearm wielded with both hands thrusts at hip height. The easiest attack to get a hit on the head with is by far the two handed thrust whilst the easiest to get a hit in their feet without sacrificing too much range in your attack is with a polearm wielded in both hands. |
|  |
Weapon range factors into your damage, say if you hit with a short sword you'll always hit with the effective part of the weapon, but if it's a long weapon and you hit at close range the damage will be reduced. To put it into perspective a 3 meter long weapon would not be as effective at 1 meter range as a 2 meter long weapon would even though the rest of the stats would be the same. You may think that attacking with a 1 meter weapon would yield the best result but no, as you connect with the very end of your weapon it would just scratch your opponent, to transmit the largest part of kinetic energy into your opponent at 1 meter range I suggest a 150 cm long weapon.
Finally when fighting indoors you gotta make sure you’ve got room to swing your weapon, you cannot swing through stone walls strangely enough, thrusting or using overheads against your opponent in a narrow portion of a Swadian castle would be more sensible than trying to swing left and right, those stone walls won’t budge.
[anchor=tag4]3. Armour
It protects you, not too hard to work out but it saves lives and it’s worth encumbering yourself with it. The body armour you’ll see players with a bit of brain in their heads wearing protects them with 18 to 26 at the start of a map. Cavalry and archers tend to have lighter armour for cavalry need to spend denars on their horse and archers tend to spend it on their bows and arrows. Armour is separated into three zones: Head, body and legs. Hand armour gives bonus protection to your body and body armours can give additional protection to your legs. Your head armour is only dependant on your head wear though, and considering that’s the critical spot I heavily suggest getting a helmet made of metal, no I do not care if you want to be a main protagonist in an action film, people without helmets died in historical battles.
As cavalry it is a good idea to spend more money on leg armour, infantry hitting your horse will most likely also hit you in the legs with swings. Because of your higher posture you will rarely get hit in the head so helmets are less important to you. As an infantry you want to have a good amount of head armour, skilled infantry will aim for the head with their melee attacks and with a really good helmet you may even survive a headshot by an archer.
To overcome armour you can trust in Mother Fortuna or make your own fortune using piercing and blunt weapons. The armour in Warband is random, it protects you with 50-100% meaning that hitting them with a blade over and over again in the same angle with the same momentum will produce different results. It is the only factor which is random when it comes to the damage that is dealt and personally I do not wish to see Taleworlds repeat the same mechanic in Warband II.
[anchor=tag5]4. Damage Types
There are three of them, cutting, piercing and blunt(ing?). They have different properties, let’s start with the cutting one which is applied to bladed weapons with a cutting edge such as swords, axes, sabres and cleavers. Cutting damage is the worst at ignoring armour but the best at shattering shields, axes deal additional damage to shields along with their high cutting damage. Cutting damage cannot be made by thrusts.
Piercing damage is applied to all ranged weapons (except for throwing axes) and ignores armour by 65%. It is the worst damage type for shattering shields but high piercing ranged weapons can penetrate shields at certain ranges and hit the one holding a shield with a reduced impact than a hit without needing to penetrate the shield first (more on that later). Piercing damage is done mainly by thrusting with melee weapons but there are a few swinging piercing weapons such as sickles, spiked clubs and the Morningstar.
Blunt weapons ignores armour by 50%, in addition to that they have a random chance of knocking your opponent down if their base damage exceeds 20. In single player blunt weapons are guaranteed to knock your opponent unconscious rather than killing them allowing for capture.
blunt weapons are maces, hammers, fists and horse hooves trampling you over.
[anchor=tag6]5. Special Weapon Attributes
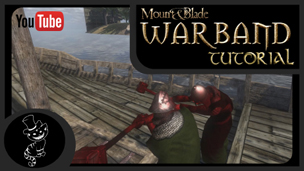
| Some weapons are able to ignore blocks entirely with their overhead attack, this attribute is given to two handed maces and hammers which can be found in the armoury of Sarranid Sultanate and the Kingdom of Rhodoks. These weapons are extremely heavy and slow with the most massive one being the Rhodokian Great Hammer able to crush through any shield guard with a charged overhead attack. |
|  |
One handed, two handed, polearm and throwing axes are given the “bonus to shield” attribute which allow them to shatter shields using fewer hits. The resistance stat of a shield, its health and the shield skill of the user will determine how much damage a shield can withstand before breaking.
Some heavier two handed and polearm hafted weapons have a negative “unbalanced” attribute which means they have an increased recovery time than other weapons when attacking. A weapon with the same speed but without the unbalanced attribute would be quicker at consecutively attacking than the weapon with the unbalanced attribute.
[anchor=tag7]6. Getting Hit
Unless you’re me on a Saturday night pumped up by tea and cookies you’ll eventually get hit on the battlefield. Depending on the type of weapon you get hit by and mother fortuna you’re staggered in different ways.
 |
| No stagger: This is when your character is unaffected by the attack and your opponents weapon bounces off you, it may have dealt some damage but the damage is too small to stagger you in any way, if you expect your opponents attack to bounce off because the weapon they are using is too shabby or their attack does not have enough momentum to do any damage to your heavy armour you can ignore blocking and attack them when they are busy recovering their weapon after it has bounced off. |
Regular: Whatever action your character was doing is interrupted but you’re free to use your lower body, one handed cutting weapons will most likely have this impact on you.
Immobilize: Unable to use neither lower nor upper body for anything in a moment. This is attributed to all polearms (with a few exceptions) but not two handed weapons, heavy ranged weaponry have this effect as well.
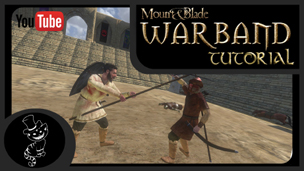
Destabilize: This is a hit with so much force that it causes your character to stumble. In this moment you’re unable to move, attack nor block until you’ve regained your balance. If you’re hit in the back you will stumble forward, hits from the side will cause you to stumble sideways. If you’re destabilized in melee you could be hit again by the same opponent if the weapon they are using is quick enough. This is caused by kicks, attacks by polearms and ranged projectiles, cannot be caused by one handed, two handed weapons nor horse hooves. A popular combo is the so called kick slash which requires you to follow up with an attack after kicking your opponent (default key: E), for this to be successful you need to release your attack as soon as both your feet are on the ground, doing it sooner will cause your attack to cancel, doing it too late will allow your opponent to block it.
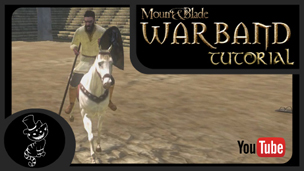
| Knockdown: This can only be done by blunt weapons which base damage exceeds 20 or with horses charging you down. You’re knocked to the ground and you are unable to do anything until you get back up again. For blunt weapons it’s a random chance but with horses it depends on their speed and their charge stat. Two handed weapons which can crush through blocks will have the same random chance even if the damage done is lessened by the shield the defender is wielding. |
|  |
[anchor=tag8]7. Stunning
This is a mechanic which even veterans may not be aware off. Stunning in this case is the act of disabling your opponents defence. It functions differently depending on if it’s manual blocking or blocking done with a shield.
How it works is that whenever you’re using a weapon in two hands your overhead attacks has the ability to stun your opponents guard. When stunned your opponent has got a moment where he/she is unable to attack and they are unable to block another attack.
 |
| How to use in a group fight: As soon as the shield or the overhead block of your opponent is hit with a charged overhead attack from a weapon held in two hands another team member follows up with an attack, if the timing is good you should be able to kill your opponent even though the scoundrel tries to block. It’s easier to support your teammate with a long weapon and if it’s quick it also gives your teammates more chances to time the follow up attack right. You are not able to stun your opponents guard long enough for you to make the follow up attack yourself, you need a teammate for this technique to work. |
| How to use in a duel with no shields: If the two handed weapon you’re wielding is heavier than your opponents you can use this technique to catch the bastard off guard. Charge your overhead attack for a second and strike the overhead block, most players will attempt to retaliate with their lighter and quicker weapon (lighter weapons usually mean quicker but that’s not necessarily the case) but as you’ve stunned your opponents arms you’ll be able to do a follow up attack before your adversary can hit you back and if the fool you face do not realize they’ll need to be on the defensive for another strike they’ll fall before you, lifeless as the might of your weapon separates their nice head from their shoulders! |
|  |
[anchor=tag9]8. Bypassing Shields with Projectiles
This section is dedicated to the boys and girls with the bows, crossbows and throwing weapons hailing from first person shooter games where those obnoxious shields are not present.
 |
| Shooting past shields, players may not consider this but the shields stat have measurements to them, rather than projecting you with a front facing forcefield like in most games you can shoot your enemy where the shield does not cover. If you are perched above your opponent you have an easier time scoring a headshot past their shields as they are aiming it towards their ground opponents, if they are aiming it too high in order to protect their face you can shoot them in the foot most likely immobilizing them for a brief moment. However if your opponent is aware their vertical aim matters and they decide to follow where your archer aim is you’ll have trouble shooting them at either places. The shield skill increases the hit box of the shield so a Rhodokian sergeant wielding any type of shield will be harder to hit than a Vaegir or Sarranid archer wielding the same shield. |
 |
| Penetrating shield, if you see that your opponent is using a shabby shield alternatively you’re using a really strong ranged weapon or any combination of the two you can choose to wait for them to run at you with their shield raised and loosen your arrow or bolt when they are at a short distance penetrating their shield and hitting the poor fighter hid behind it. Your success is dependent on your opponents shield resistance, the speed of your projectile, the damage of your projectile, the speed at which your opponent is moving towards you and also where you aim, you’ll have more success aiming for your opponents head behind the shield than anywhere else. |
 |
| Jump shot past shield matrix action! You can jump and shoot or throw above your opponents shield, this is a high risk manoeuvre for if you fail you may get a high momentum stab in the naughty parts as you leap towards your opponent. |
[anchor=tag10]9. Chambers
Now for the cool stuff, I’m gonna teach you how to be a badass and block attacks without touching the right mouse button!
 |
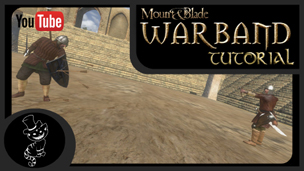
| How: By attacking in the direction of the incoming attack instead of blocking, it needs to be timed right or else the chamber will fail and you’ll be hit. You need to take into account the movement of your opponent’s lower body, the speed of your opponent’s weapon as well as the direction the attack is coming from. A bit trickier than pressing a button to parry which leaves your enemy helpless. Unlike Dark Souls however this technique does not guarantee you a hit upon success, if your opponents reactions are sharp the scoundrel may still block it or even counter chamber it! But chambering a spear and shield user will guarantee you a hit. You can chamber thrusts with an overhead or a thrust of your own but you cannot chamber an overhead using a thrust. |
| Uses: Breaking the flow in a duel, if your opponent is getting predictable you can surprise the fool with a chamber. When using a hammer you can chamber your opponents thrusts or overhead with a devastating block crushing overhead of your own. Mastering the art of chambering allow you to put up a fight using weapons that cannot block otherwise such as great lances, knives or your fists. You can chamber couched lances which would otherwise shatter your shield, you’ll keep your shield and if you’re close enough to the horse when chambering you may even get a hit on it whereas blocking and then attacking would be too slow to catch up with it. You need a shield in your off hand in order to chamber couched lances, it does not work otherwise and it’s an enigma as to why that is the case. *shrug* |
|  |
[anchor=tag11]General tips and tricks
This is not really a section on its own as it does not relate to anything in particular but these tricks could prove useful in some situations.
- Binding the view outfit action to a convenient key can allow you to quickly scout your surroundings while on the move without slowing you down.
- Hitting a horse does not stop your weapon from hitting an enemy allowing you to hit both horse and rider in a single attack.
- Binding each weapon slot to a key allows you to quickly switch between weapons rather than cycle through them using your mouse, handy for those with a sensitive scroll wheel.
- A spear and shield thrust is longer but has a slower recovery time and initiates at a longer range making it harder to gain enough momentum to do any significant damage at shorter ranges.
- When you play as a crossbowman you can quickly shield yourself by cycling your next shield (default key: Scroll down) when using a crossbow, this could be used to defend yourself against a lance in the last second.
- While scaling a ladder you can move side to side rapidly to scale it quicker.
- Moving in and out of cover in the same pattern makes it easily predictable and a skilled archery will kill u for it.
[anchor=tag12]End and credits
There you go, now you're ready to go out and take on the world! Oh and one last thing:
LESS TALKING, MORE RAIDING!!
Credits goes to Muzzle for taking the time and effort to create all the videos seen in this guide and all members of the Cheshire Cats Clan (CCC) who volunteered as test dummies in them.
Credits goes to Muzzle for taking the time and effort to create all the videos seen in this guide and all members of the Cheshire Cats Clan (CCC) who volunteered as test dummies in them.