Texture Seams, How to make them disappear?

Users who are viewing this thread

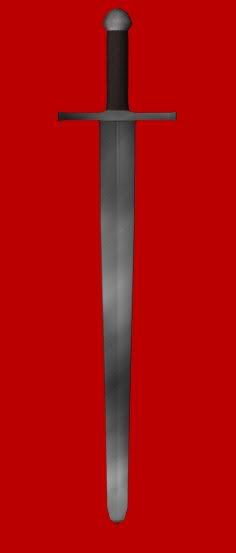
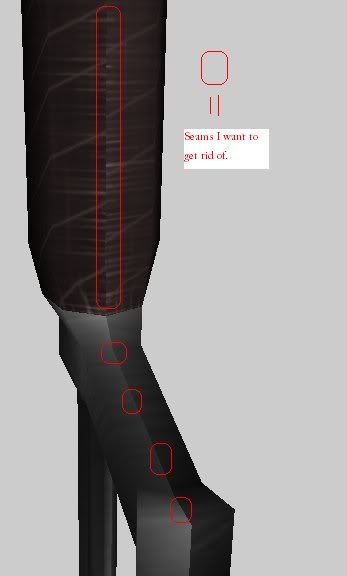
Recently I made this sword, and decided that I would make a texture from scratch for it. Well, I made the texture, and applied it, but when i looked at the textured model, i noticed that the seams really spoiled the look. Does anyone have tips, or a way to make these disappear?
texture1.jpg

texture2.jpg
 
If you're going to put the sword in the game then I doubt you'd be able to see the seams, especially considering the the added effect of lighting etc. You could add the sword in the game and have a look at it then, if there is still a problem then you could try remapping.
 
piece of advice on UV mapping:

if you have 2 objects which are identical and flow into eachother in the model, then rotate one of them horizontally and place it exactly over the other one. problem solved, it will look singular.

just think of the best way to make a transition.
 
Thanks for the tips guys.

I have on e more question though. When I turn M&B's graphics all the way down, I can see the seams of the textures, but when i turn the graphics all the way up, they blend into one another, how does this happen?
 
Lowered graphics settings use a smaller version of the texture (a mipmap). When mipmaps are created (auto generated by the DDS converter), they are blurred to prevent graphical artifacts appearing. You need to account for this blurring by painting a few extra pixels outside your UV map.
 
CheeseOnToast said:
Lowered graphics settings use a smaller version of the texture (a mipmap). When mipmaps are created (auto generated by the DDS converter), they are blurred to prevent graphical artifacts appearing. You need to account for this blurring by painting a few extra pixels outside your UV map.

So, i should paint my textures over the uvmap a bit, to blend the seams?
 
Yes. The larger the texture, the more "padding" you should allow. For example, for a 1024x1024 texture allow at least 4 extra pixels "bleed", if not more.
 
depending on what your texture sheet looks like, you could just quite simply copy and paste over the small sections to seal it up.

here I copy a border
12.jpg


I then rotate it horizontally and paste it to preserve pixel continuity.

13-1.jpg


this'll work on rounding out small edge jobs
 
Back
Top Bottom