Mrdarknezz
Recruit

Hello i decided to make a tutorial on UV mapping since there is so few.
What you need:
Wings 3d, you can find it at http://www.wings3d.com/ (Part 1, Part 2)
A painting program, i highly recommend Adobe photoshop. But a good option is either Gimp http://www.gimp.org/downloads/ or Paint.net http://www.getpaint.net/download.html (Part 2)
Some modelling skills with wings 3d. (always needed )
)
Chapters:
Part 1 UV mapping:
Step 1 creating a cube
Step 2 open UV window
Step 3 Coloring part
Step 4 Cutting edges
Step 5 unfolding
Step 6 UV map
Part 2 Editing uv map
Step 1 Outliner
Step 2 Make external
Step 3 Editing/Importing
Part 1:
Step 1. Before i start the tutorial I'm going to explain what UV mapping is. UV mapping is when you cut out the 3d model into a 2d model, and with the 2d model you can export as a .BMP file to edit in a painting software, then you kinda import the .BMP file that you have edit and then you can see that the 3d model looks different. Hopefully you understand a bit how this works now
So lets begin with making an Cube:
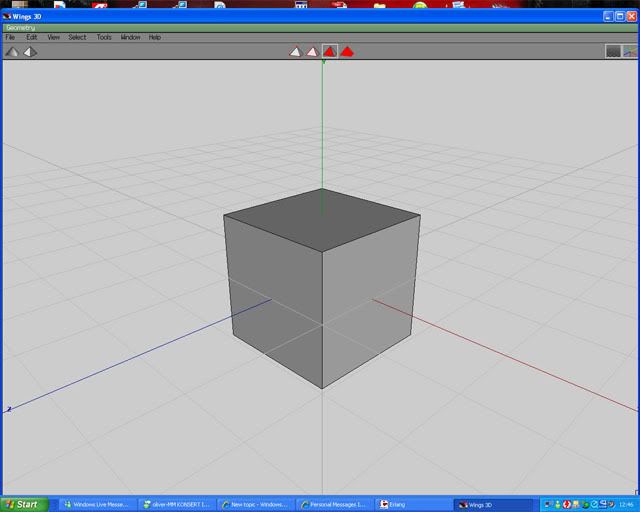
Step 2. As you can see it's all grey and boring, so the next step is to select it( so the whole cube is red) and right click and then press UV mapping->Direct.
Then a small windows should pop up like this:
 '
'
Now if you haven't got that window up you probably haven't selected the whole cube. If you haven't selected the whole cube, do so and repeat step 2.
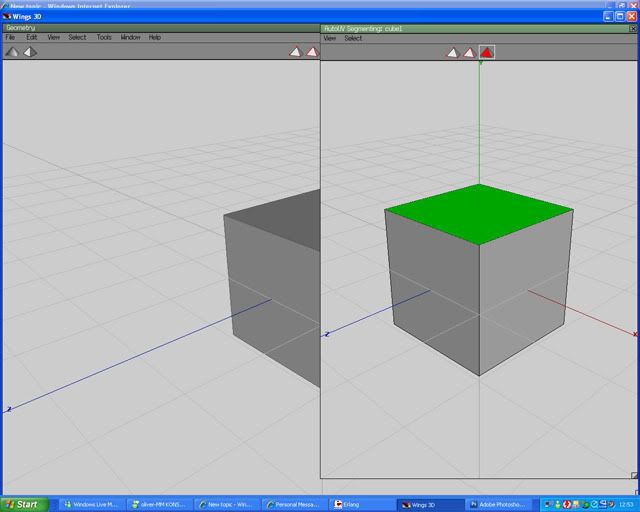
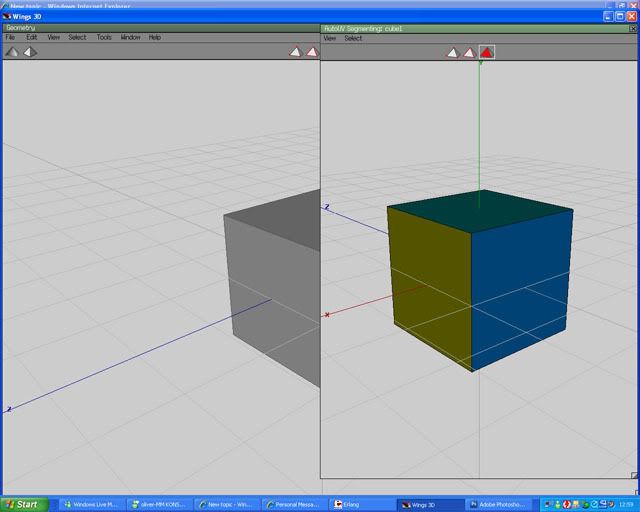
Step 3. Now comes the UV mapping part. Now what you should do is to click each side of the cube, the right click and click on different colors for different sides. When your finished it should look some thing like this:
Step 4. This is where you cut the model into a 2d images. So what you should now is that you press the edges button. Then you select one of the edges on your cube (in the UV map window) right click and press Mark edges for cut, it should look like this:
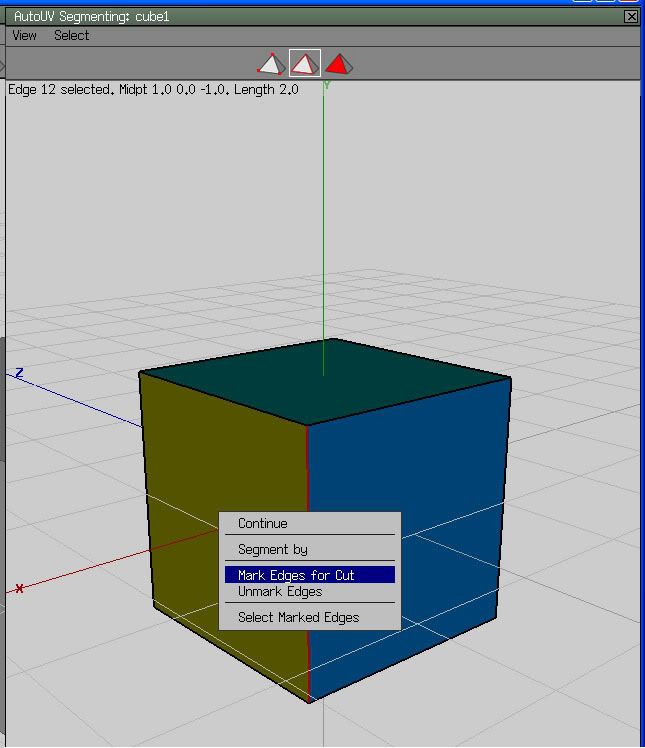
PS: now that edge that you "Mark edges for cut" should have a green color.
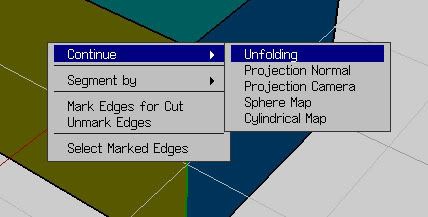
Step 5. When you've done with step 4 you should right click and press Continue->Unfolding
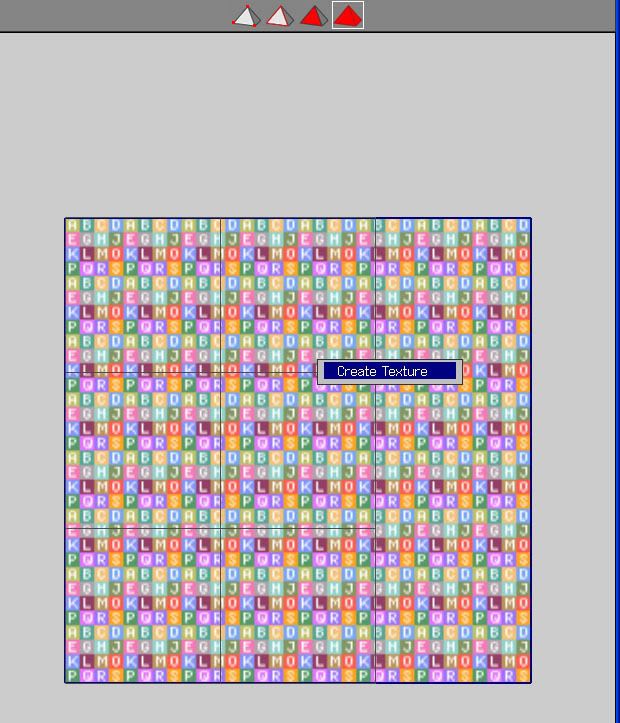
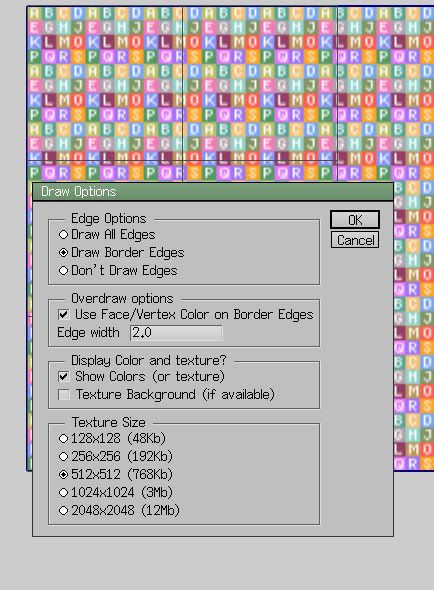
Step 6. Here you will see a flat images with 6 squares selected, press space to unselect them. After that you should right click and press create texture, then press OK in the little window that pops up:
Part 2
This part involves Photoshop so if you don't have photoshop, download one of the photo editing program and try to keep up.
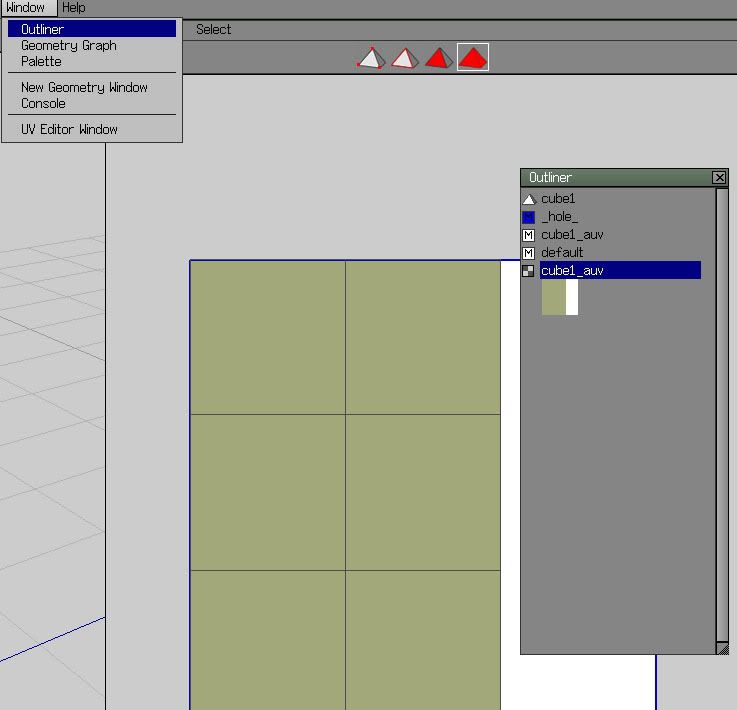
Step 1. Before we do anything on step 1 in part 2 i want you to check part 1 and see that everything is correct, if your done checking that everything is correct we continue. this is the part when we import/export the UV map. So what you should do is that you click Window->Outliner, then a window will pop up, scroll down until you find a picture that looks like the one you have in the UV map window.
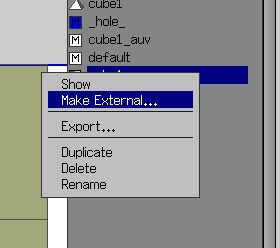
Step 2. Right click on the cube icon and press make external, save it in the Wings 3d folder:
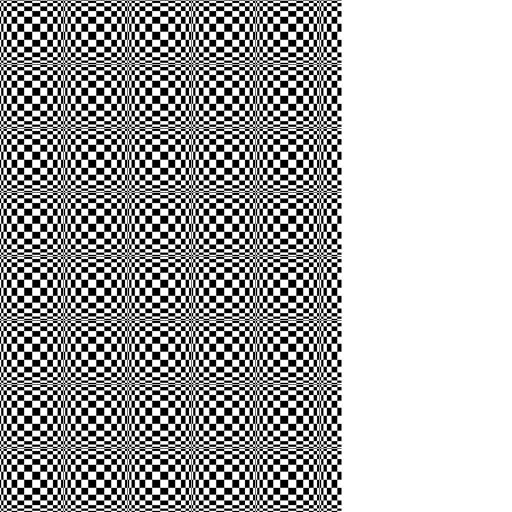
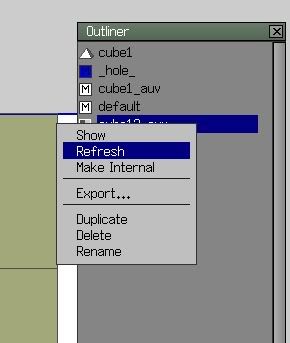
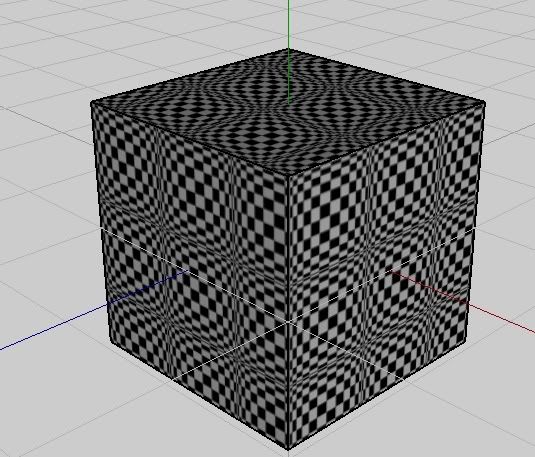
Step 3. Open the file that you saved in the Wings 3d folder and edit it with in the colored area. When you done editing save the file, open up wings 3d, right click on the icon and press refresh and you will see the result:
What you need:
Wings 3d, you can find it at http://www.wings3d.com/ (Part 1, Part 2)
A painting program, i highly recommend Adobe photoshop. But a good option is either Gimp http://www.gimp.org/downloads/ or Paint.net http://www.getpaint.net/download.html (Part 2)
Some modelling skills with wings 3d. (always needed
)Chapters:
Part 1 UV mapping:
Step 1 creating a cube
Step 2 open UV window
Step 3 Coloring part
Step 4 Cutting edges
Step 5 unfolding
Step 6 UV map
Part 2 Editing uv map
Step 1 Outliner
Step 2 Make external
Step 3 Editing/Importing
Part 1:
Step 1. Before i start the tutorial I'm going to explain what UV mapping is. UV mapping is when you cut out the 3d model into a 2d model, and with the 2d model you can export as a .BMP file to edit in a painting software, then you kinda import the .BMP file that you have edit and then you can see that the 3d model looks different. Hopefully you understand a bit how this works now
So lets begin with making an Cube:
Step 2. As you can see it's all grey and boring, so the next step is to select it( so the whole cube is red) and right click and then press UV mapping->Direct.
Then a small windows should pop up like this:
Now if you haven't got that window up you probably haven't selected the whole cube. If you haven't selected the whole cube, do so and repeat step 2.
Step 3. Now comes the UV mapping part. Now what you should do is to click each side of the cube, the right click and click on different colors for different sides. When your finished it should look some thing like this:
Step 4. This is where you cut the model into a 2d images. So what you should now is that you press the edges button. Then you select one of the edges on your cube (in the UV map window) right click and press Mark edges for cut, it should look like this:
PS: now that edge that you "Mark edges for cut" should have a green color.
Step 5. When you've done with step 4 you should right click and press Continue->Unfolding
Step 6. Here you will see a flat images with 6 squares selected, press space to unselect them. After that you should right click and press create texture, then press OK in the little window that pops up:
Part 2
This part involves Photoshop so if you don't have photoshop, download one of the photo editing program and try to keep up.
Step 1. Before we do anything on step 1 in part 2 i want you to check part 1 and see that everything is correct, if your done checking that everything is correct we continue. this is the part when we import/export the UV map. So what you should do is that you click Window->Outliner, then a window will pop up, scroll down until you find a picture that looks like the one you have in the UV map window.
Step 2. Right click on the cube icon and press make external, save it in the Wings 3d folder:
Step 3. Open the file that you saved in the Wings 3d folder and edit it with in the colored area. When you done editing save the file, open up wings 3d, right click on the icon and press refresh and you will see the result: