Here is a tool I'm building with The Last Day module in mind (you know, the Lord of the Ring based one). I was developing it inside that community, but why not share here. It is meant to be used to preview and edit BRF files (Binary Resource Files), i.e. most content of the game (e.g. meshes and animations).
Download:

| latest ver: 0.0.82e [update notes] -- (19 Jun 2016) [exe in mb-repository] (just unzip in any folder and run -- if upgrading over 0.0.81 or earlier: overwrite DLLs !) [source code] -- given under GNU General Public License |
Feature list:
Basic Features:
- Loading & saving:
- Loads and saves all contents of BRF files:
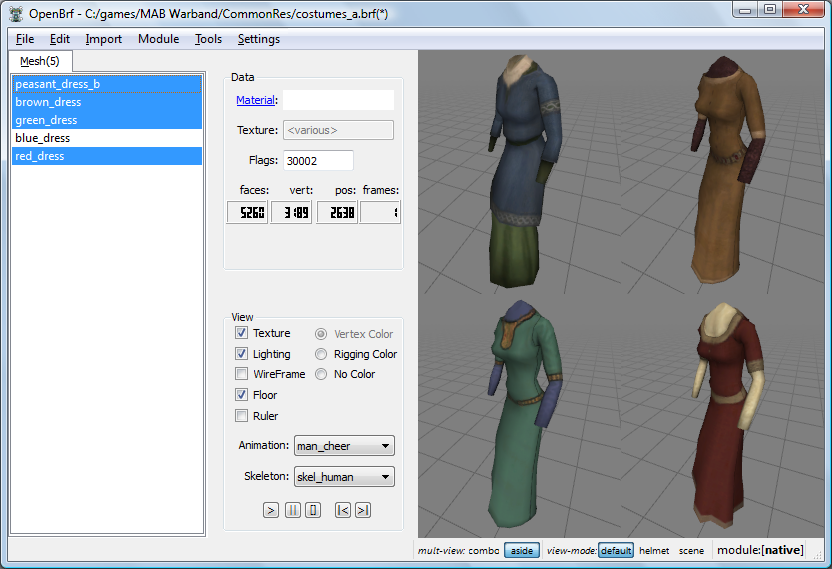
- Meshes (including vertex-animated & rigged)
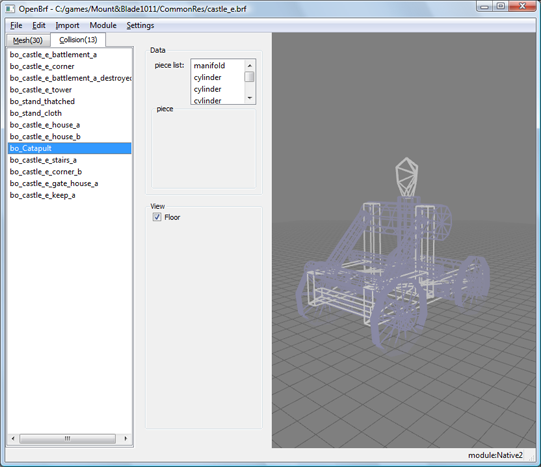
- Collision objects (including spheres capsules manifold & faces...)
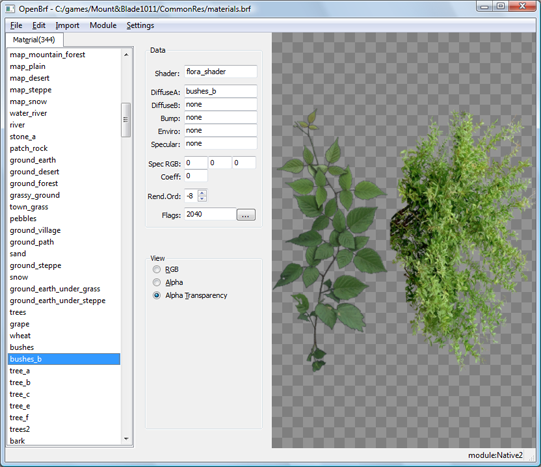
- Textures, Materials, Shaders
- Skeletons, Skeletal-animations.
- Compatibility:
- M&B ver 1.011 complaint.
- Back compatibility with M&B .808 BRF files (load only).
- "Forward" compatibility with Warband BRF files (save/load).
- Loads and saves all contents of BRF files:
- Viewing:
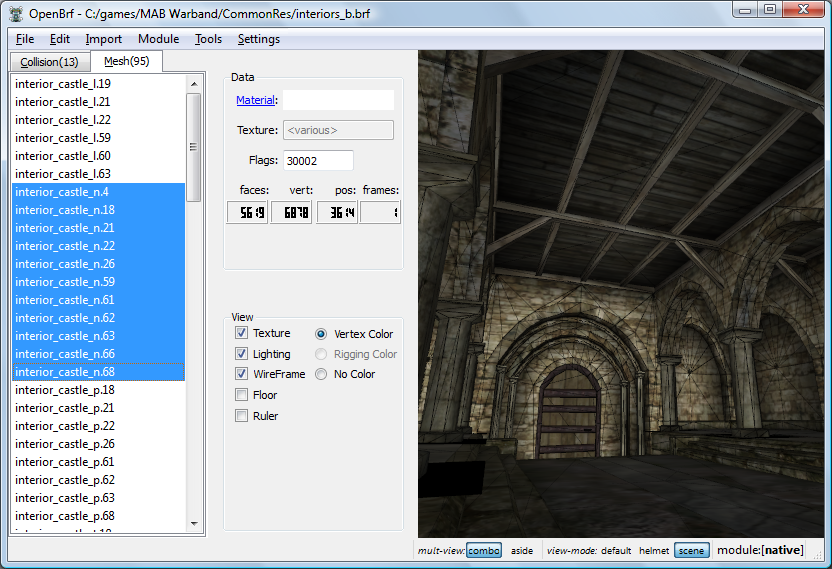
- Meshes, Collision objects, Skeletons, Skel-animations, Texture, Material and Hit-boxes:
shown in 3D view (using, as appropriate, textures, wireframe, per-vertex color, animations, customizable skins, alpha channel, xrays -- for collision objects, etc) - All attributes for all objects (e.g. flags, numbers and strings) are shown in the GUI.
- navigation mode (WASD) for interiors; custom view orientation for helmets.
- "side-to-side", "combined", "auto" modes for viewing multiple selections.
- Meshes, Collision objects, Skeletons, Skel-animations, Texture, Material and Hit-boxes:
- Importing & exporting:
- Meshes exported/imported in: obj (including multi-material), ply, dxf (autocad), dae (collada), off.
(not all formats allow to export vertex colors or normals. Normals are recomputed if missing). - Rigged meshes, Skeletal-Animations: export/import as SMD (or maya .ma, experimental)
- Skeletons: export/import as SMD -- also, export/import as a control (static) mesh
- Vertex-animated meshes: export/import as MD3, or as separate frames,
- Collision bodies: export/import as multiple-object obj (notes on usage: see this info)
- Hit-boxes: save/load in/from data.xml file, or as turn into Collision Bodies (notes on usage: see this info)
- Meshes exported/imported in: obj (including multi-material), ply, dxf (autocad), dae (collada), off.
- Basic editing:
- Direct editing of any attribute of any object (e.g. flags).
- Group edits: multiple-select objects to view or edit them all in one go (e.g. renaming a group will edit prefixes)
- Cut (ctrl+X), copy (ctrl+C) and paste (ctrl+V) objects to easily move them from a brf file to another.
- Remove, rename, duplicate, sort objects: move them up and down in the list. Group rename works also for groups of objects (you change, add, or remove common prefixes). Sort objects alphabetically (command under "Tools"). Etc.
- With [ctrl+R] you repeat last command!
- Undo/redo with [ctrl+Z], [ctrl+Y]
- Autobreak-up of animations into sub-sequences:
(useful for for long sequence of animations listed as a single one). Animation can be either auto-split, by dividing chunks separated by large gaps in frame numeration, or split by following an action.txt file (in this case, a new action.txt is also produced, which refers the new split animations. The original action.txt file is kept intact -- just for safety).
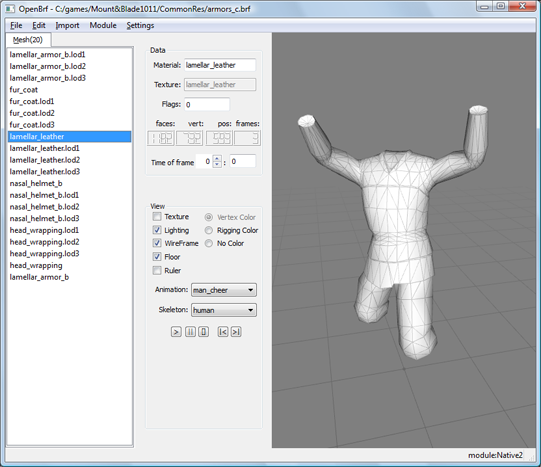
How-to: Just right click on an animation in the list. - Customizable skinning to view animations: rigged meshes can be enlisted to compose "skins". Skins are sets of user-selected rigged meshes which are used by OpenBrf to display skeletal-animations. Similarly, animations can be set as "reference animations" so that you can see your rigged meshes under that animation. Skins can also be used to export animations/rigged meshes/skeletons.
How-to: Right click on the mesh to add it to a skin, or on an animation to use it as a "reference" animation. Reference objects (skeletons, animations, models) are auto-saved but you can also edit them directly (tools=>edit reference models). - Simplified skeleton retouching through meshes: this is to allow edits of the skeleton w/o using an animation program (small thing, mostly for myself). First, export a "skeleton modification mesh", which is just a static mesh (e.g. obj) featuring the bones. Then, edit the resulting mesh using any 3D editor; don't change bone size, number or shape: only their orientation and positions. Then, you use that mesh to modify the skeleton, and openBRF will modify just bone positions/orientation, keeping all else, like bone names, bone connections etc.
- Reskeletonize tool for rigged meshes: This can be used to go from a mesh rigged for skeleton A to make a new mesh rigged for skeleton B. (if the two skeletons are similar enough). The mesh will deform to adapt to the new skeleton. This is not supposed to be perfect, but can be a start for further editing. Optionally, the deformed mesh can be placed as a frame to the original body mesh (you know, just how natives hides feminine version of armor shapes in subsequent frames).
- Transfer rigging from a mesh to another: to transfer rigging from a rigged "exemplar" mesh to one or more target (usually non rigged) mesh (Similar to "obj2smd" program.).
How to: (1)select one or more exemplar meshes, (2)copy [ctrl+C], (3)select one or more target mesh, (4)"edit" -> "paste rigging" - Transfer timings: to transfer timings (times per frame). How to: as above, but use "paste timings"
- Copy lower part of an animation: to transfer the lower part of an animation (legs and abdomen position) into another animation. Useful for example to turn an animation for standing charter on the counterpart for mounted characters. How to: as above, but use "paste lower part of animation"
- Mirror (animations): that's what you'd expect: left half of the body will do what the right half did (but mirrorred).
- Mount/unmount things on bones: to attach a given item over a bone of a skeleton of choice: it will be moved in position and rigged to that bone. Also, the reverse. Also useful to make skins. Also includes special predefined carry-positions (e.g. scabbards tied on belts or shields carried on back), as used by M&B/WB (but customizable). Inverse funcitons also available (see under [discard]=>[rigging])
- Freeze skeletal animation frames: to make a static "statue" out of a rigged object (in a given position) (see under [discard]=>[rigging])
- Make small sub-pieces of rigged mesh rigid: an small autofix tool for rigged objects. Its use is to make small pieces of a rigged mesh, like plates of an armour, move rigidly during skeletal animations, i.e. without deforming. The pieces are identified as connected components of the mesh. How to: right click on the mesh and select corresponding option.
- Hit-box manipulation: see more info in this [tutorial]
- Combine meshes tools: [combine] makes one mesh from many (works with static, vertex-animated, rigged meshes alike). Similarly, you can select and copy (ctrl+C) one or more meshes, then select one or several target meshes, and use [edit]=>[paste into mesh] to copy the former into the letter, merging them. In this case, LODs are mantained, meaning that meshes of a given lod will be only merged with target meshes of the same lod.
- Split meshes tool: Command [Split into connected sub-components] separate selected mesh(es) into one mesh for each topologically separated piece (note: after working on each piece separately, you can assemble them back, see above)
- Rescale-rotote-translate, Mirror etc: just as the name says. Also, in the [roto-transalte-tool] there are buttons to center the object around (or above, or below) the zero (in any axis separately). For convenience, you can also roto-translate-scale an object while seeing other reference objects fixed, e.g. to align them accurately to each other.
- Vertex optimization tool: merges together positions and vertices, clean redundant, dangling, repeated vertices, and so on, so that the data is more compact and rendering efficient. You can see the number of vertices and positions go down in the "data" box. There is also an option to automatically perform these operations after import ([setting]=>[on import meshes]).
- Redefine hard-edges: hard edges (normal discontinuities) can also be redefined using a custom crease-angle parameter, with the above tool. Texture seams can be preserved or ignored.
- Normal computations: recomputes normals, allowing for selectable amount of crease angles (aka hard edges)
- Tangent direction computations: tang. dirs, which are needed for bumpmapping and some shaders, can be computed (from UV-mapping) over your meshes (they can be saved only as WarBand BRF).
- LoDs computation: OpenBRF can build lod's (level of details) for your meshes, progressively simplifying them by automatic polygonal reduction. Under "settings", you can customize which lod are produced, and how much polygonal reduction should take place.
- Ruler and "floating probe" measuring tools: the first is designed to pinpoint the precise reach of weapons. The second to identify locations over a mesh (results also copied to clipboard, for convenience).
- Back-faces: add them (creates x2 faces), or remove them. Useful for flat impostors that must be seen from both sides.
- "Feminization" of outfits: you can pick an armor/outfit of your mod and make OpenBRF build the feminine version of it (it will be added as another frame of that mesh, just like the game wants).
- Transfer of attribute between meshes: you can Copy one (or more) mesh(es), then paste their attributes into one or more target mesh(es) (see under [edit] menu). Attribute you can transfer include: per vertex color, UV mapping, vertex animation, rigging,...
- VERTEX COLOR HANDLING
- Recoloring: (i.e. per vertex colors support). Assign a uniform color, or tune hue-saturation-brightness-contrast of existing colors.
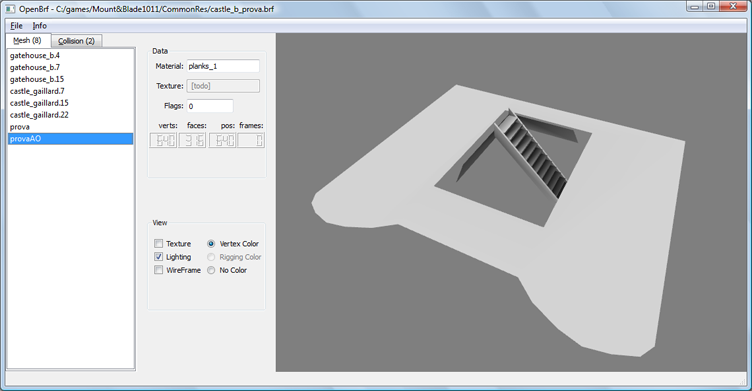
- Ambient occlusion: computes ambient occlusions and stores it as per vertex color. Adds a lot of realism cheap and fast to your meshes. Also works on meshes grouped together (depending on the current "view mode" settings). A few parameters (darkness, and light dispositions) can be tuned under "settings".
- Transfer color from another mesh: How-to: copy exemplar mesh(-es), select target mesh(-es), [edit]=>[paste vertex colors].
- Transfer color from texture: gets the color from a texture and saves it as per-vertex colors.
- [Multiply colors] (!keep Shift pressed when applying any of the above four options, and the current mesh colors will be multiplied, instead of substituted, with the new ones!)
- Tune hue saturation brightness: of vertex colors.
- Smart Import/exports of subparts: to make collision objects using the efficient "sphere" and "capsules" primitive. See more info [here]
- Auto-quadrangolization: to turn a triangle-based Collision Object to a more efficient Quad-dominant one (because, in game, it is better to use fewer quads than more triangles).
- Smart visualization: "X-rays" style. Also, real meshes can be visualized together with the collision mesh, to see how much it matches (it must reside in the same BRF file, and be called the same name, at most with a "bo_" added at the beginning).
- Scale/translate/rotate/mirror/merge: of Collision objects
- Build from mesh: turn a mesh (or a group of meshes) into a collision object (note: it better be closed, and appropriately low res).
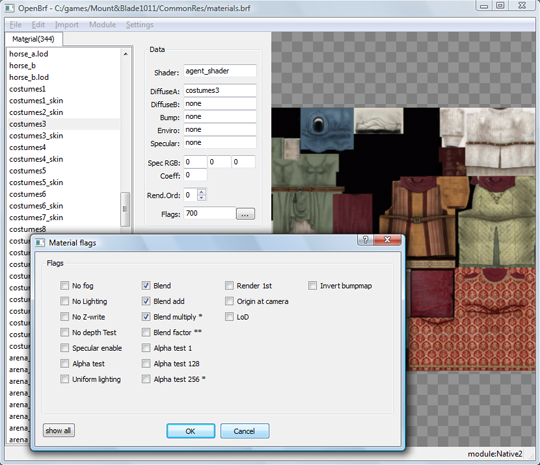
- Direct flag editing: of material, textures. Meaning of each flag reported.
- Editing of multiple materials/meshes: just make a multiple selection and edit flags, texture names, etc.
- Texture data: openBRF will tell you everything about resolution, mipmap level, compression mode, disk size, location (module or common folder) etc of your textures. You can open them in explorer by the press of a button.
- Mini-"can't find texture" diagnostics: if openBRF is not able to show textures, for whatever reason, it shows a checkboard replacement and offer a mini-diagnostic under settings
- Material rendering: openBRF will try to guess rendering of a material (shininess, transparency, cutouts...) when rendering a material over a mesh. Normalmap and specular maps too.
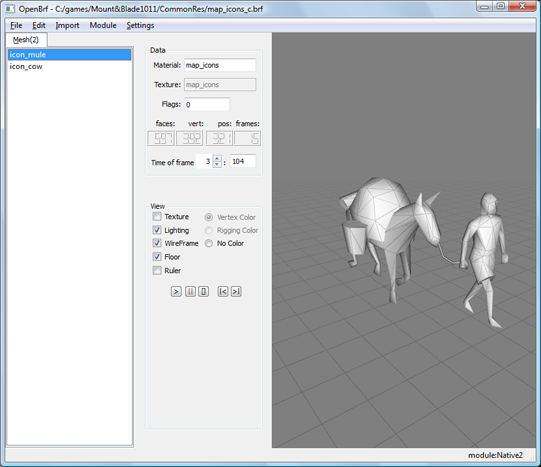
Info: a vertex animation consists in one mesh where per-vertex XYZ positions and normals are repeated for each frame.
UV coords, triangle structure, per vertex colors, etc, are shared among all frames. They are used for animated icons (e.g. on the map), animated weapons (like bows), animated hands, face-morphs (one frame for each customizable features), animated quivers (each frame a different number of arrows), and even auto-refitting outfits (e.g. one armour with the male version in one frame, the feminine version in another).
UV coords, triangle structure, per vertex colors, etc, are shared among all frames. They are used for animated icons (e.g. on the map), animated weapons (like bows), animated hands, face-morphs (one frame for each customizable features), animated quivers (each frame a different number of arrows), and even auto-refitting outfits (e.g. one armour with the male version in one frame, the feminine version in another).
- Frame stacking: vertex animation are build stacking each frame separately.
You can import them separately, or use the cut-frame, copy-frame, paste-frame operations (under "edit"). Either way, you can choose one of two algorithms in order to actually assemble the animation (make your choice under "settings" menu): either you trust the vertex order of your mesh, or you distinguish vertices by their vertex coordinates. More info in this post. - Direct import/export: as MD2 files
- Copy timings: to transfer per-frame timings from an ani to another (selecting the first animation, copy it (ctrl+C), select second ani, "edit"->"paste timings".
- Split frames / merge frames: separate the vertex animation in separate meshes -- one per frame, and recombine them into a vertex animation (possibly after editing them, or changing their order).
- Construct from rigged: a rigged mesh, or a skinned animation, can be converted into the equivalent vertex animation.
- "Quiver" mode: a mode to help making animations where first frame is the most complete object (e.g. quiver and all arrows), and subsequent frames remove sub-parts by shringking them to a point (e.g. a quiver with fewer or no arrows). Start with most complete object, every staked frame will produce a copy of first frame with any missing polygon shrunk to a point. Activate under [settings]=>[on assemble vertex animations].
- Fast ini loading: to make a quick auto-scan of the entire dataset as described in the ini- file (i.e.\ read all the included brf files for further references).
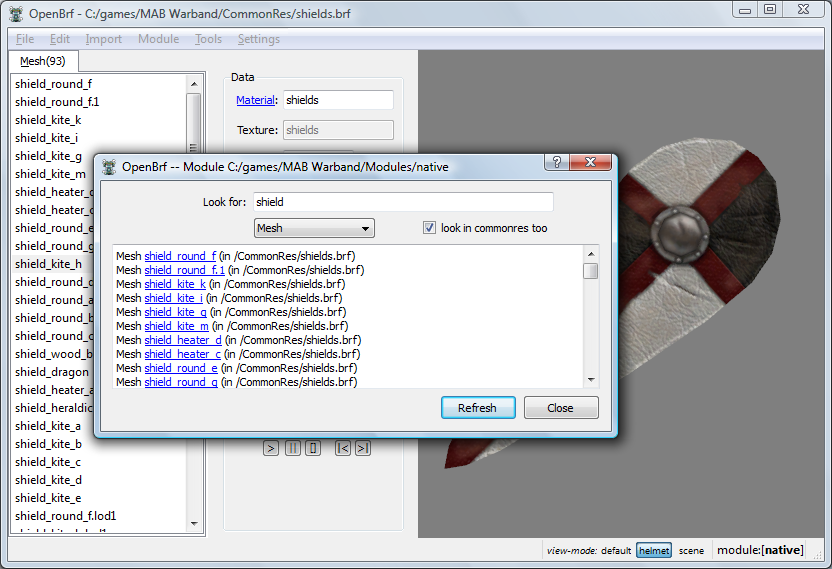
- Module navigation: to jump from a mesh to its material and from a material to its textures/shader (and back). Use Ctrl-arrows (left/right), or click on labels (e.g. "Material") in the panel. A links is provided go back from when you came.
- "Used-by" submenu: (the opposite of the above): you can see all other objects using an object (and load them if you want). E.g. given a material, all meshes in the mod which use that material. The same menu shows all txt files making any use of that object, directly or indirectly (txt files are the one the games loads when it loads your module) .
- Autocompletion: of texture names, etc. Also, after you copy an object (ctrl-C), you can paste its name (ctrl-V) in a text box (you can still paste the object itself in the object list, to move it from a brf file to another).
- Verify-module tool: to scan the entire module for errors and inconsistencies: missing texture, doubled item, meshes using unknown material,wrong brf order in ini file. It's in the "module" menu. [HokieBT and Dain Ironfoot suggestion]
- Search: to look for objects with a certain string in the name [HokieBT and Darwin suggestion]
- Scanning of txt: so that OpenBRF knows what Meshes, Matrerials, Skeletons... etc your module is using. Objects are color coded accordingly. More info [here]
- Show unreferenced DDS tool: to see what texture files (DDS and TIFs) are sitting on the hard drive unused, and, optionally, confine them in a "unused" folder.
- Dump module content from prompt: if you run it from the command line (or a batch file) like this:
then OpenBRF will not open the GUI, but instead it will dump an easy-to-parse text file with the names of all the meshes, materials, animations... etc found in the BRF files which are listed in the ini of the module. This is intended to be used by other mod tools, e.g. to add auto-completion or error checking.Code:OpenBRF.exe --dump <module_path> <file.txt>
- most tools can be applied over multiple objects in one go: just make a multiple selection first
- most tools are accessed by right-clicking on over selected item(s) in the list, or though the [selected] menu.
- you can repeat last command with [ctrl+R], and undo redo with [ctrl+Z] and [ctrl+Y]
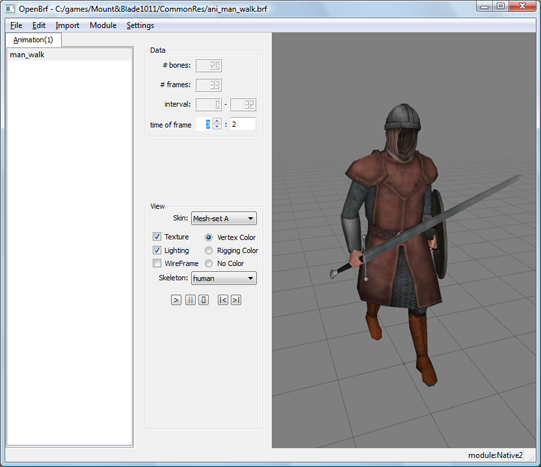
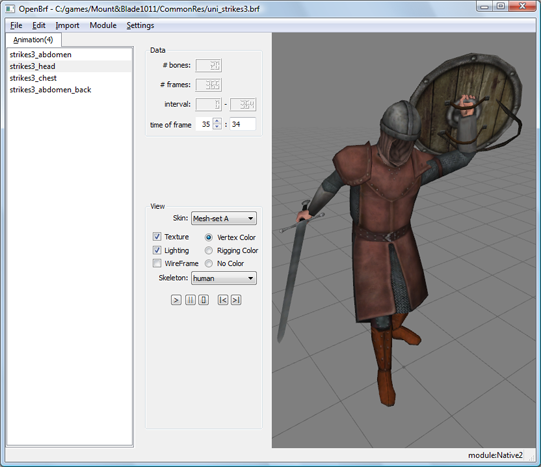
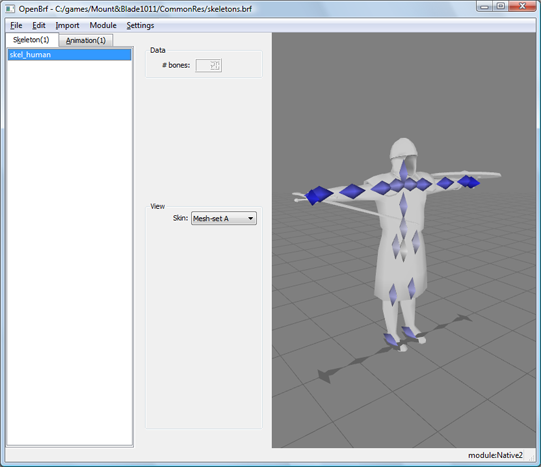
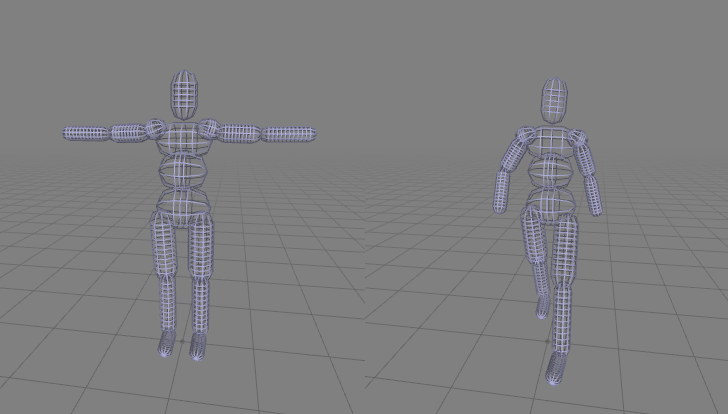
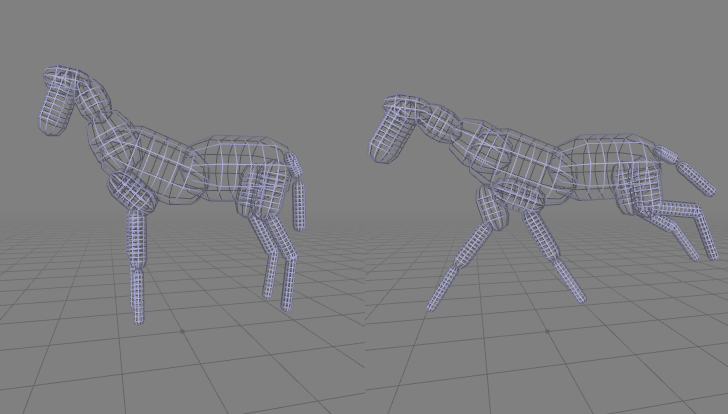
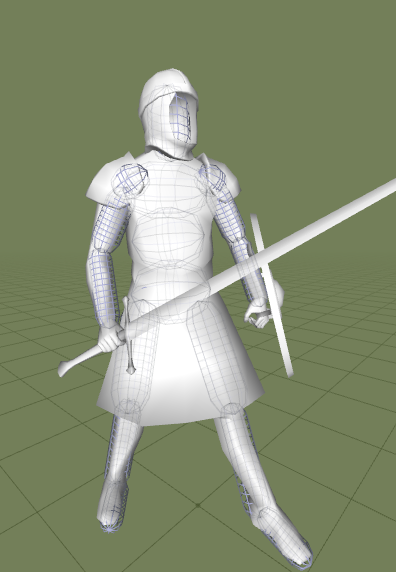
Screenshots:
a skeletal animation displayed with a customizable skinning:

Thanks to:
[amade] for the nice icon!
[cmpxchg8b] for the many info on the M&B/WB engine, including flags, carry-positions and more!
[Swyter] for the nice banner above!
[Foxyman] for completing the translation support!
[Vornne] for the Unix compilation fixes!
the translators: [Foxyman] (again), [Roemerboy], [Swyter] (again), [Vlejundo]!
all the many testers, suggestion givers, bug reportes...: a probably incomplete list is found in the "About" screen!
Last edited by a moderator: