


You are using an out of date browser. It may not display this or other websites correctly.
You should upgrade or use an alternative browser.
You should upgrade or use an alternative browser.
Official 3D art thread - Warband
- Thread starter WeeSeng
- Start date
Users who are viewing this thread
Total: 2 (members: 0, guests: 2)


Looking nice so far for your first Blender Model !
I made this sword and I just dont know how to make a normal map for it
Baking is just so fiddly and I never get the results I want
Any idea ?

Primarily I want to replace the hard edges with the normal map
I made this sword and I just dont know how to make a normal map for it
Baking is just so fiddly and I never get the results I want
Any idea ?
Primarily I want to replace the hard edges with the normal map
ThaneWulfgharn
Master Knight

That's cool and you wouldn't need a normalmap for it. Hard edges and everything is just fine.BlancMiles said:Looking nice so far for your first Blender Model !
I made this sword and I just dont know how to make a normal map for it
Baking is just so fiddly and I never get the results I want
Any idea ?
Primarily I want to replace the hard edges with the normal map

BlancMiles said:Looking nice so far for your first Blender Model !
I made this sword and I just dont know how to make a normal map for it
Baking is just so fiddly and I never get the results I want
Any idea ?
Primarily I want to replace the hard edges with the normal map
CrazyBump is pretty reliable if you don't need the perfect normal map.

BlancMiles said:Looking nice so far for your first Blender Model !
I made this sword and I just dont know how to make a normal map for it
Baking is just so fiddly and I never get the results I want
Any idea ?
Primarily I want to replace the hard edges with the normal map
That could use a normal map. PM if you need any ideas.

A model for Battle of Europe
Long Handgonne (View in 3D)
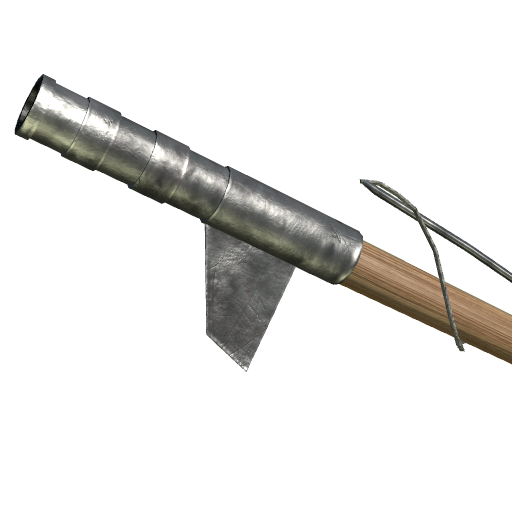
BoE= http://forums.taleworlds.com/index.php/topic,239917.600.html
Long Handgonne (View in 3D)
BoE= http://forums.taleworlds.com/index.php/topic,239917.600.html
minnakodunum
Knight at Arms

Steel part looks really cool but wooden part has huge issues with textures (I know its not stretcing but looks like it does).


BlancMiles said:Looking nice so far for your first Blender Model !
I made this sword and I just dont know how to make a normal map for it
Baking is just so fiddly and I never get the results I want
Any idea ?
Primarily I want to replace the hard edges with the normal map
Paint your normal maps with gimp, it's is quite easy and pretty fast.
I prefer architecture

Making a highpoly version of that sword and baking it is the quickest and simpler way to make a good normal map, hands down.
If you don't want to sculpt or add more details via a highpoly object, at least bake the surface of the sword, you can overlay with texture generated normalmaps with the additional details afterwards:
1-Copy the object;
2-Go to Edit Mode with the new object and set hard edges (Shift + E with edge selected, pan the mouse to set hardness);
3-Apply 'Subdivision Surface' modifier to it with at least 3 levels of subdivision;
4-Select all the mesh (Ctrl + A) of the low poly object (the one without subdivision) in Edit mode and create a new image with the desired size in the UV Edit tab (open up one if you don't have it);
5-In object mode, select both objects (highpoly first, then Shift + select lowpoly);
6-Go to the 'Render' tab (the one with the camera icon) and search for the 'Bake' section (generally in the bottom);
7-Select 'Bake mode: Normals' e 'Normal Space: Tangent', check 'Selected to active' and uncheck 'Bake from Multires' then click 'Bake';
8-Done, save the file and overlay it with other normalmaps in your image editing program of choice.
Hm yes thanks, I already did this some days ago but there were many problems ...
I tried many things and options but I never get an acceptable result
I tried many things and options but I never get an acceptable result
What happened exactly?
I tried it again 100% the way you described and I failed in the beginning ...
 When I subdivide the Sword Simple, all the egdes are hardened (picture left)
But when I subdivide Catmull, there is a part of everything cut away later
However ... the result is ... interesting ...

But when I subdivide Catmull, there is a part of everything cut away later
However ... the result is ... interesting ...
Bake is fine then.
You need to experiment a bit more with subdivisions and edge creasing, though.
Set it to 'Catmull-Clark' and try applying ~1 crease to all the edges that you want to keep sharp: blade edges, crossguard edges, borders of the handle, etc.
If the surface is meant to be round, it should be round in the highpoly, it doesn't matter if it doesn't match the lowpoly perfectly - part of the reason why baking them is good, it will actually imprint that surface roundness to the lowpoly through the normalmap.
Obviously it can't differentiate too wildly or the program will have issues knowing what surface is to imprint where, but it'll be fine in that case - if it doesn't, just mess around with the 'Bias' value, here a quick link on the matter, you may want to research further: link too long
Now, if you want the pommel to look faceted, apply ~1 of creasing to all its edges to see what happens, go mess around with that and you'll probably get it right, it's simpler than you think.
Here's an example with the edges I'd apply crease on:

With almost all of them I'd probably go with 1.00, only with the edge loop in the middle of the handle I'd go with around 0.5.
If you want to remove the crease from an edge, just select the desired edge and set Crease (as shown by the arrow) to 0.
Important 1: Turn 'Edge split' off until you grasp the basics, it can make subdivision go all wonky in places if not done right.
Important 2: It's preferable that the subdivided mesh to be not triangulated, go with quads and you'll have less problems too.
You need to experiment a bit more with subdivisions and edge creasing, though.
Set it to 'Catmull-Clark' and try applying ~1 crease to all the edges that you want to keep sharp: blade edges, crossguard edges, borders of the handle, etc.
If the surface is meant to be round, it should be round in the highpoly, it doesn't matter if it doesn't match the lowpoly perfectly - part of the reason why baking them is good, it will actually imprint that surface roundness to the lowpoly through the normalmap.
Obviously it can't differentiate too wildly or the program will have issues knowing what surface is to imprint where, but it'll be fine in that case - if it doesn't, just mess around with the 'Bias' value, here a quick link on the matter, you may want to research further: link too long
Now, if you want the pommel to look faceted, apply ~1 of creasing to all its edges to see what happens, go mess around with that and you'll probably get it right, it's simpler than you think.
Here's an example with the edges I'd apply crease on:
With almost all of them I'd probably go with 1.00, only with the edge loop in the middle of the handle I'd go with around 0.5.
If you want to remove the crease from an edge, just select the desired edge and set Crease (as shown by the arrow) to 0.
Important 1: Turn 'Edge split' off until you grasp the basics, it can make subdivision go all wonky in places if not done right.
Important 2: It's preferable that the subdivided mesh to be not triangulated, go with quads and you'll have less problems too.


Similar threads
- Replies
- 1
- Views
- 404